OG Image Template
Create an OG Template
Creating dynamic Open Graph images starts with designing a template in the OpenGraph.xyz Template Editor. This guide will walk you through the basics of template creation, including the use of layers, attaching variables, and setting modifications to make your images truly dynamic.
Getting Started
Before diving into the design, you need to navigate to our platform and start your template creation process.
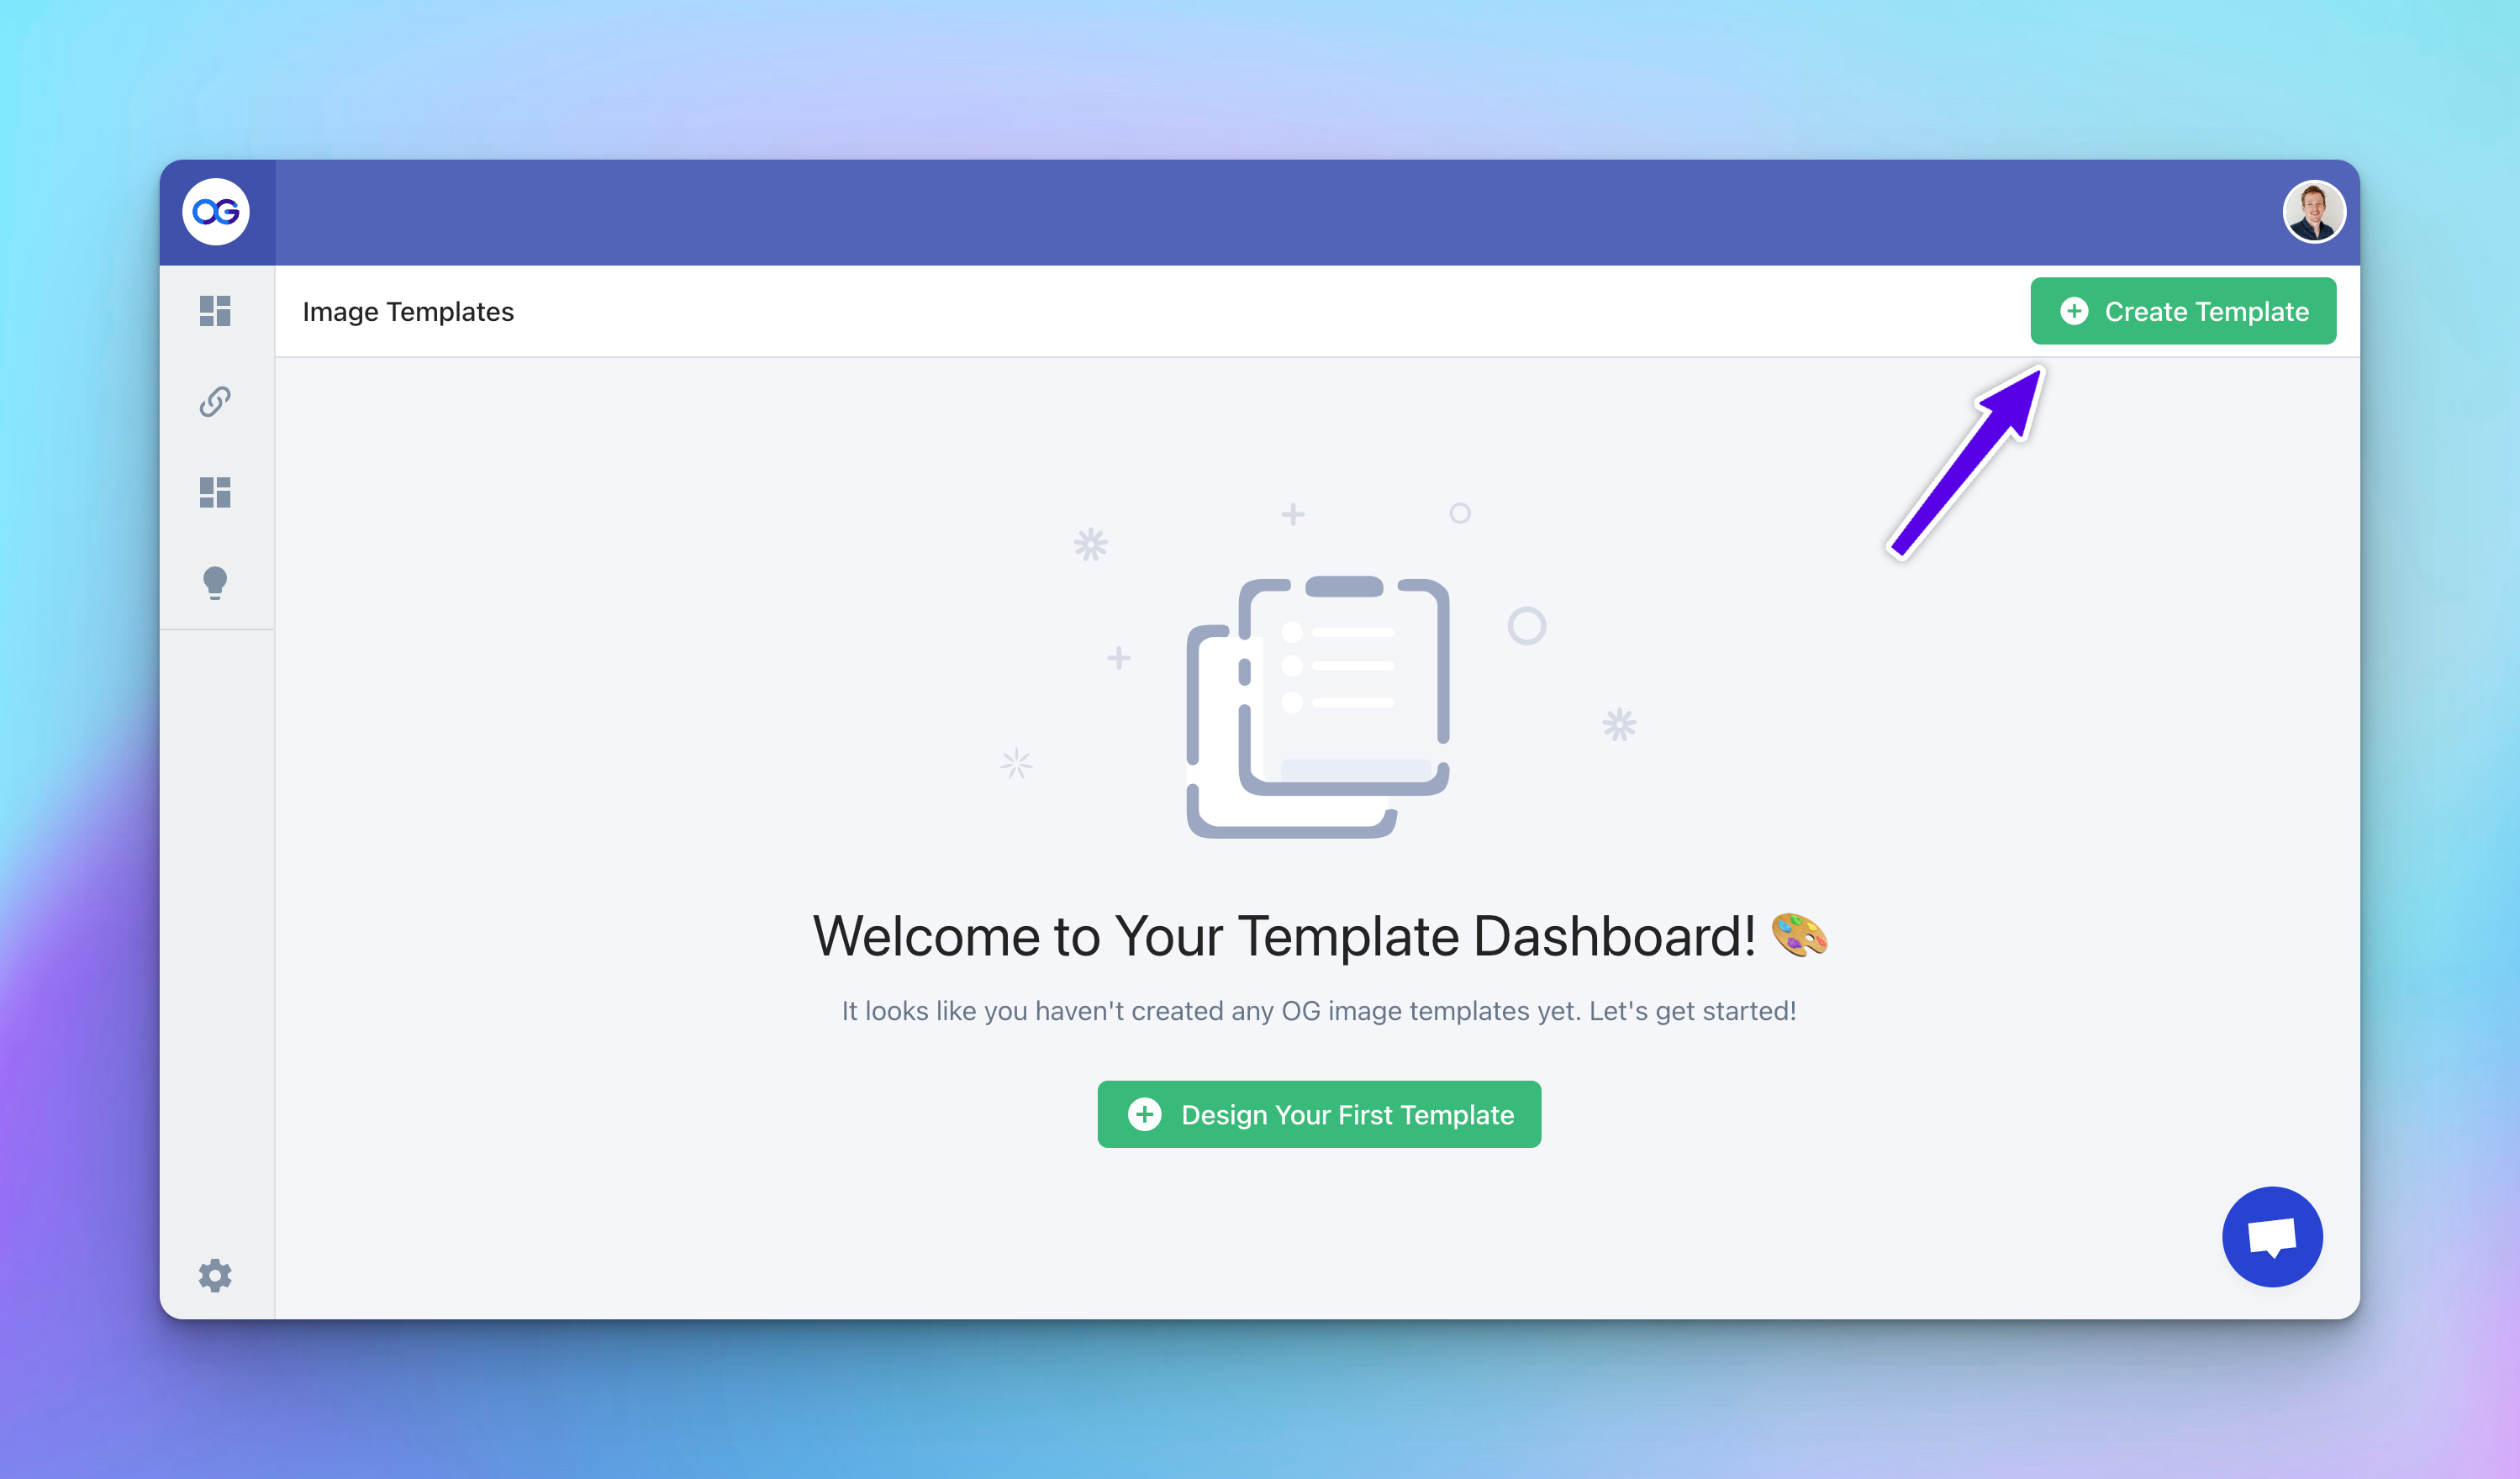
- Access the Dashboard: Go to dashboard.opengraph.xyz.
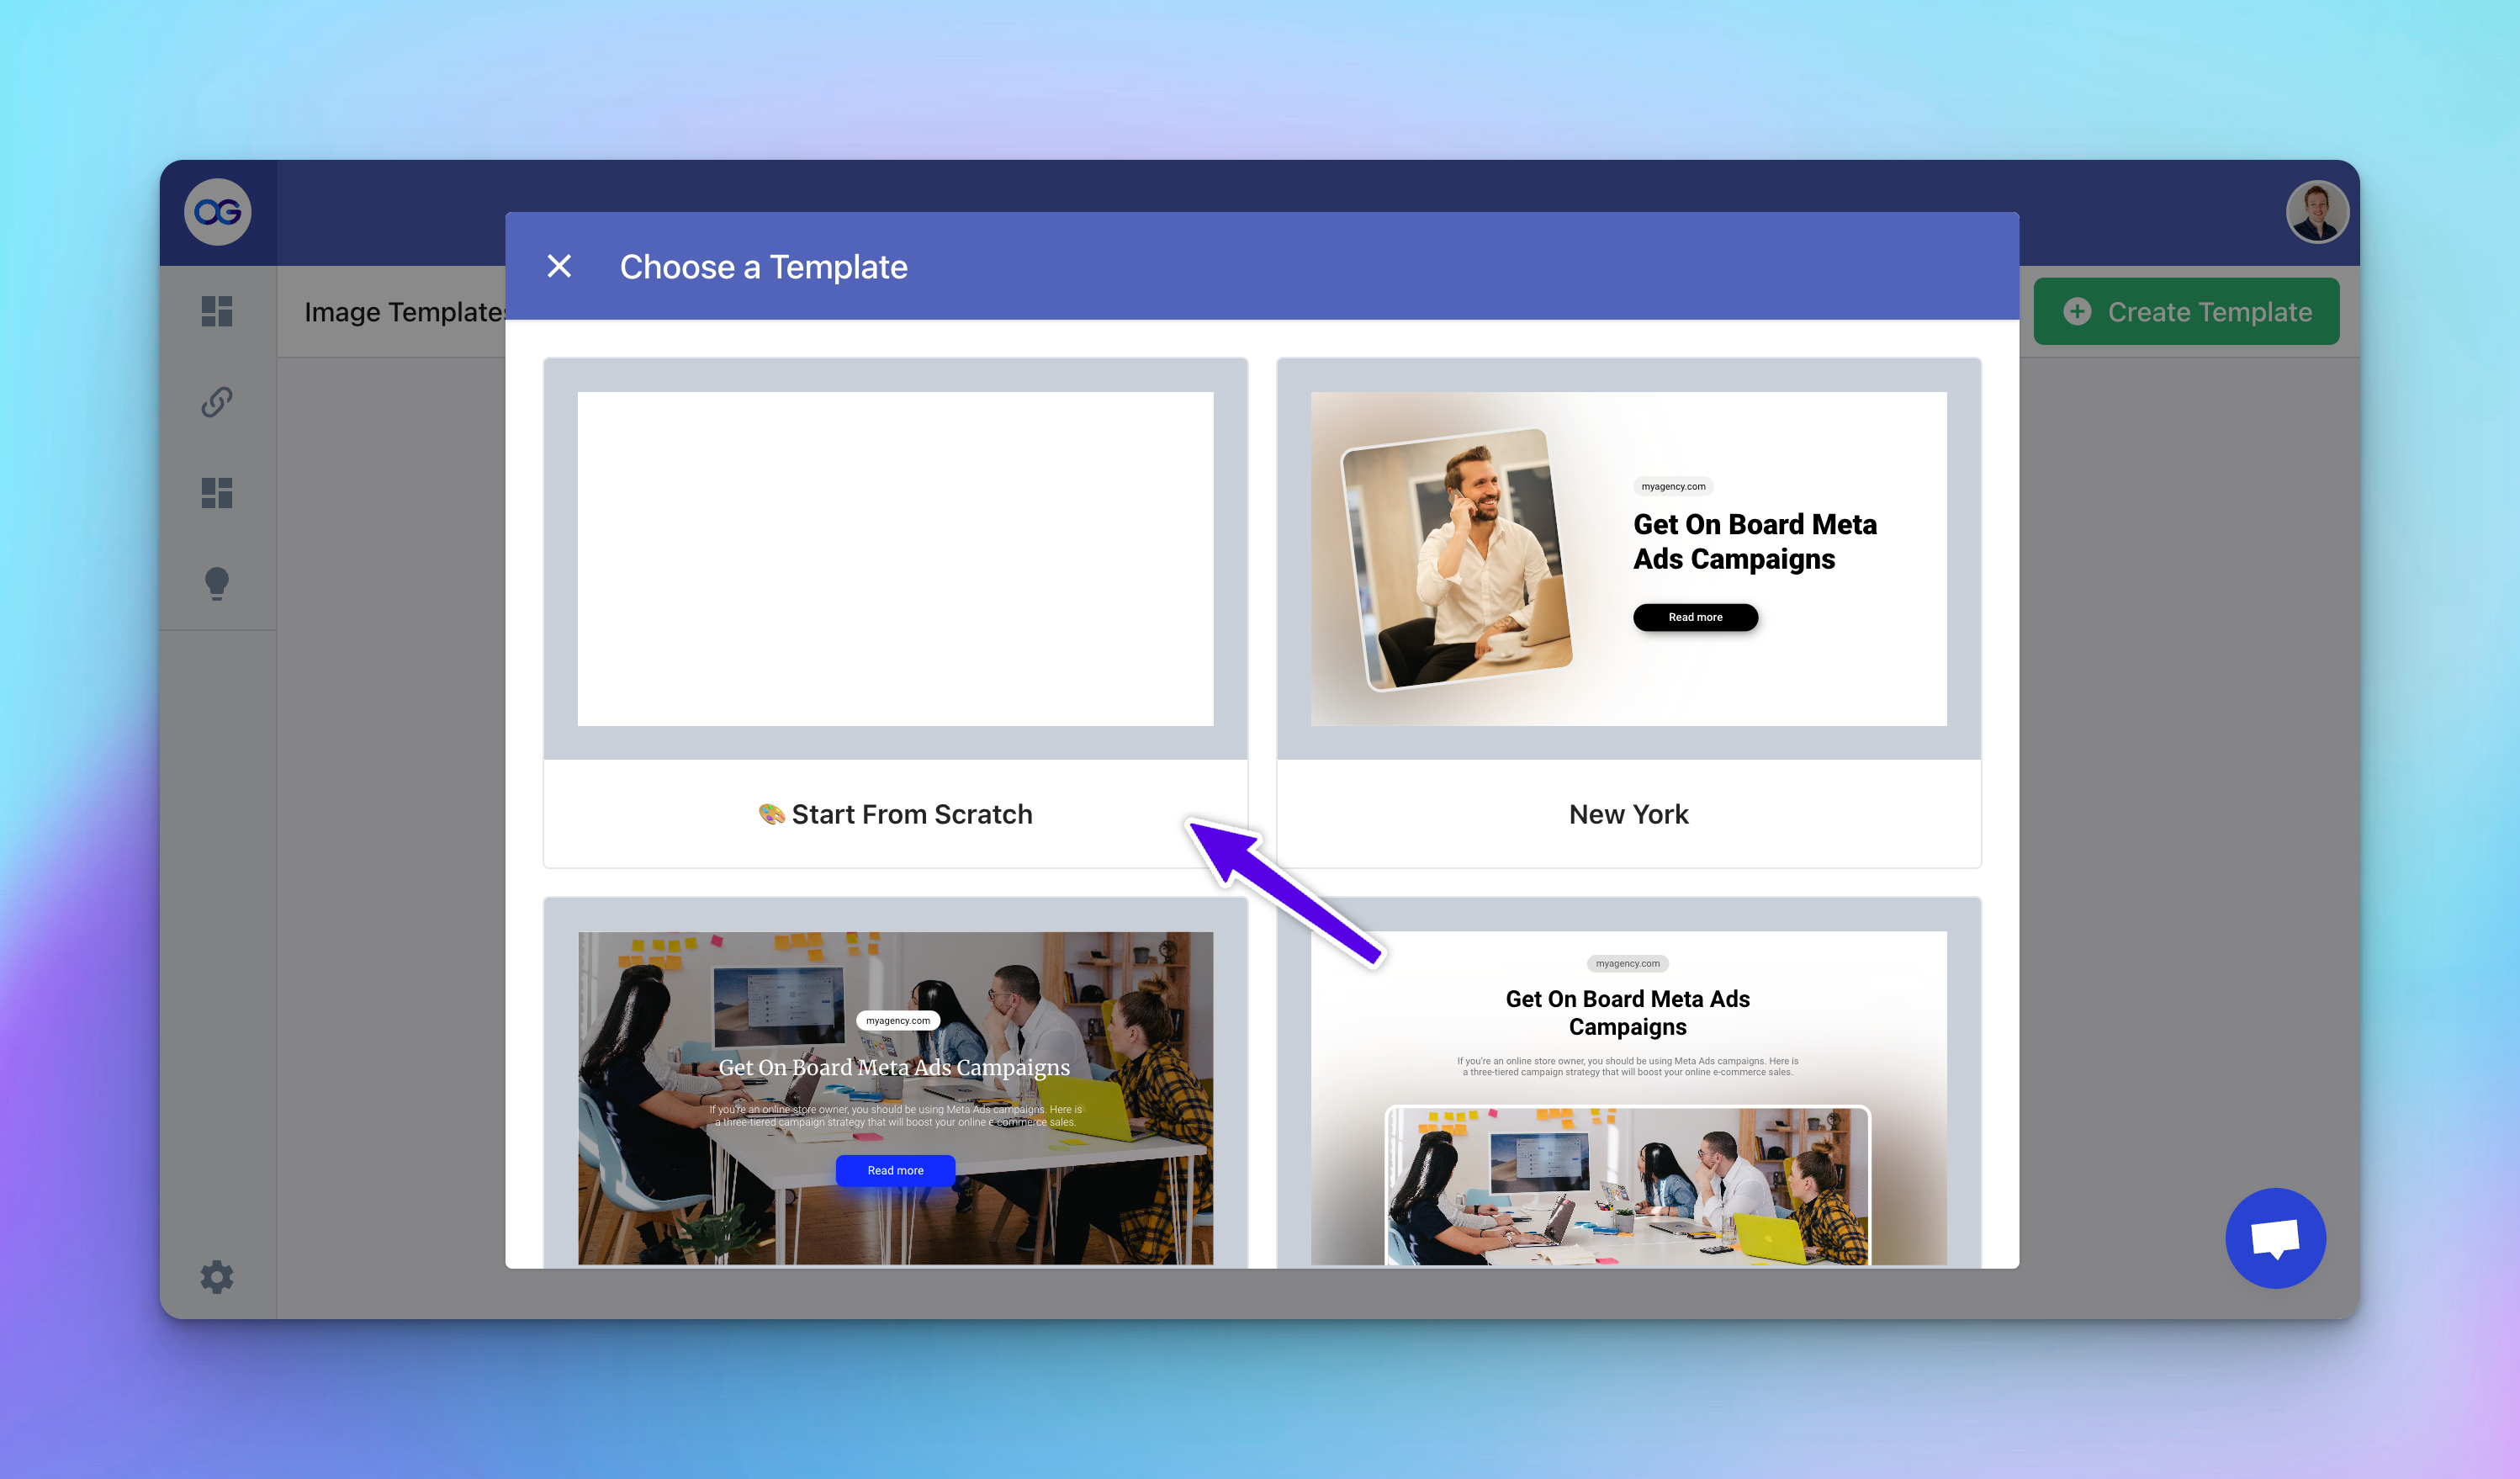
- Create a New Template: Click on the “Create Template” button. Here, you have the option to either choose an existing template as a basis or start from scratch.
- Choose Your Starting Point: For this tutorial, we'll select “Start from Scratch” to build our template from the ground up.
Step 1: Understanding Layers
In the OpenGraph.xyz Template Editor, a template is composed of layers. Think of layers as the building blocks of your OG image. There are three main types of layers you can use:
- Text: Add textual content to your image. This can be a title, a description, or any custom text.
- Image: Insert images to make your template visually rich.
- Rectangle: Use rectangles to create backgrounds, borders, or to segment your design visually.
Layers can be stacked, rearranged, and customized to create the foundation of your template.
Step 2: Creating a Simple Template
Now, let's create a template featuring a text layer for the title and a rectangle layer for a decorative border.
Adding a Rectangle Border
Let’s start by creating a colorful frame around your canvas which will act as the foundation of your template. Here's how you can create a striking frame:
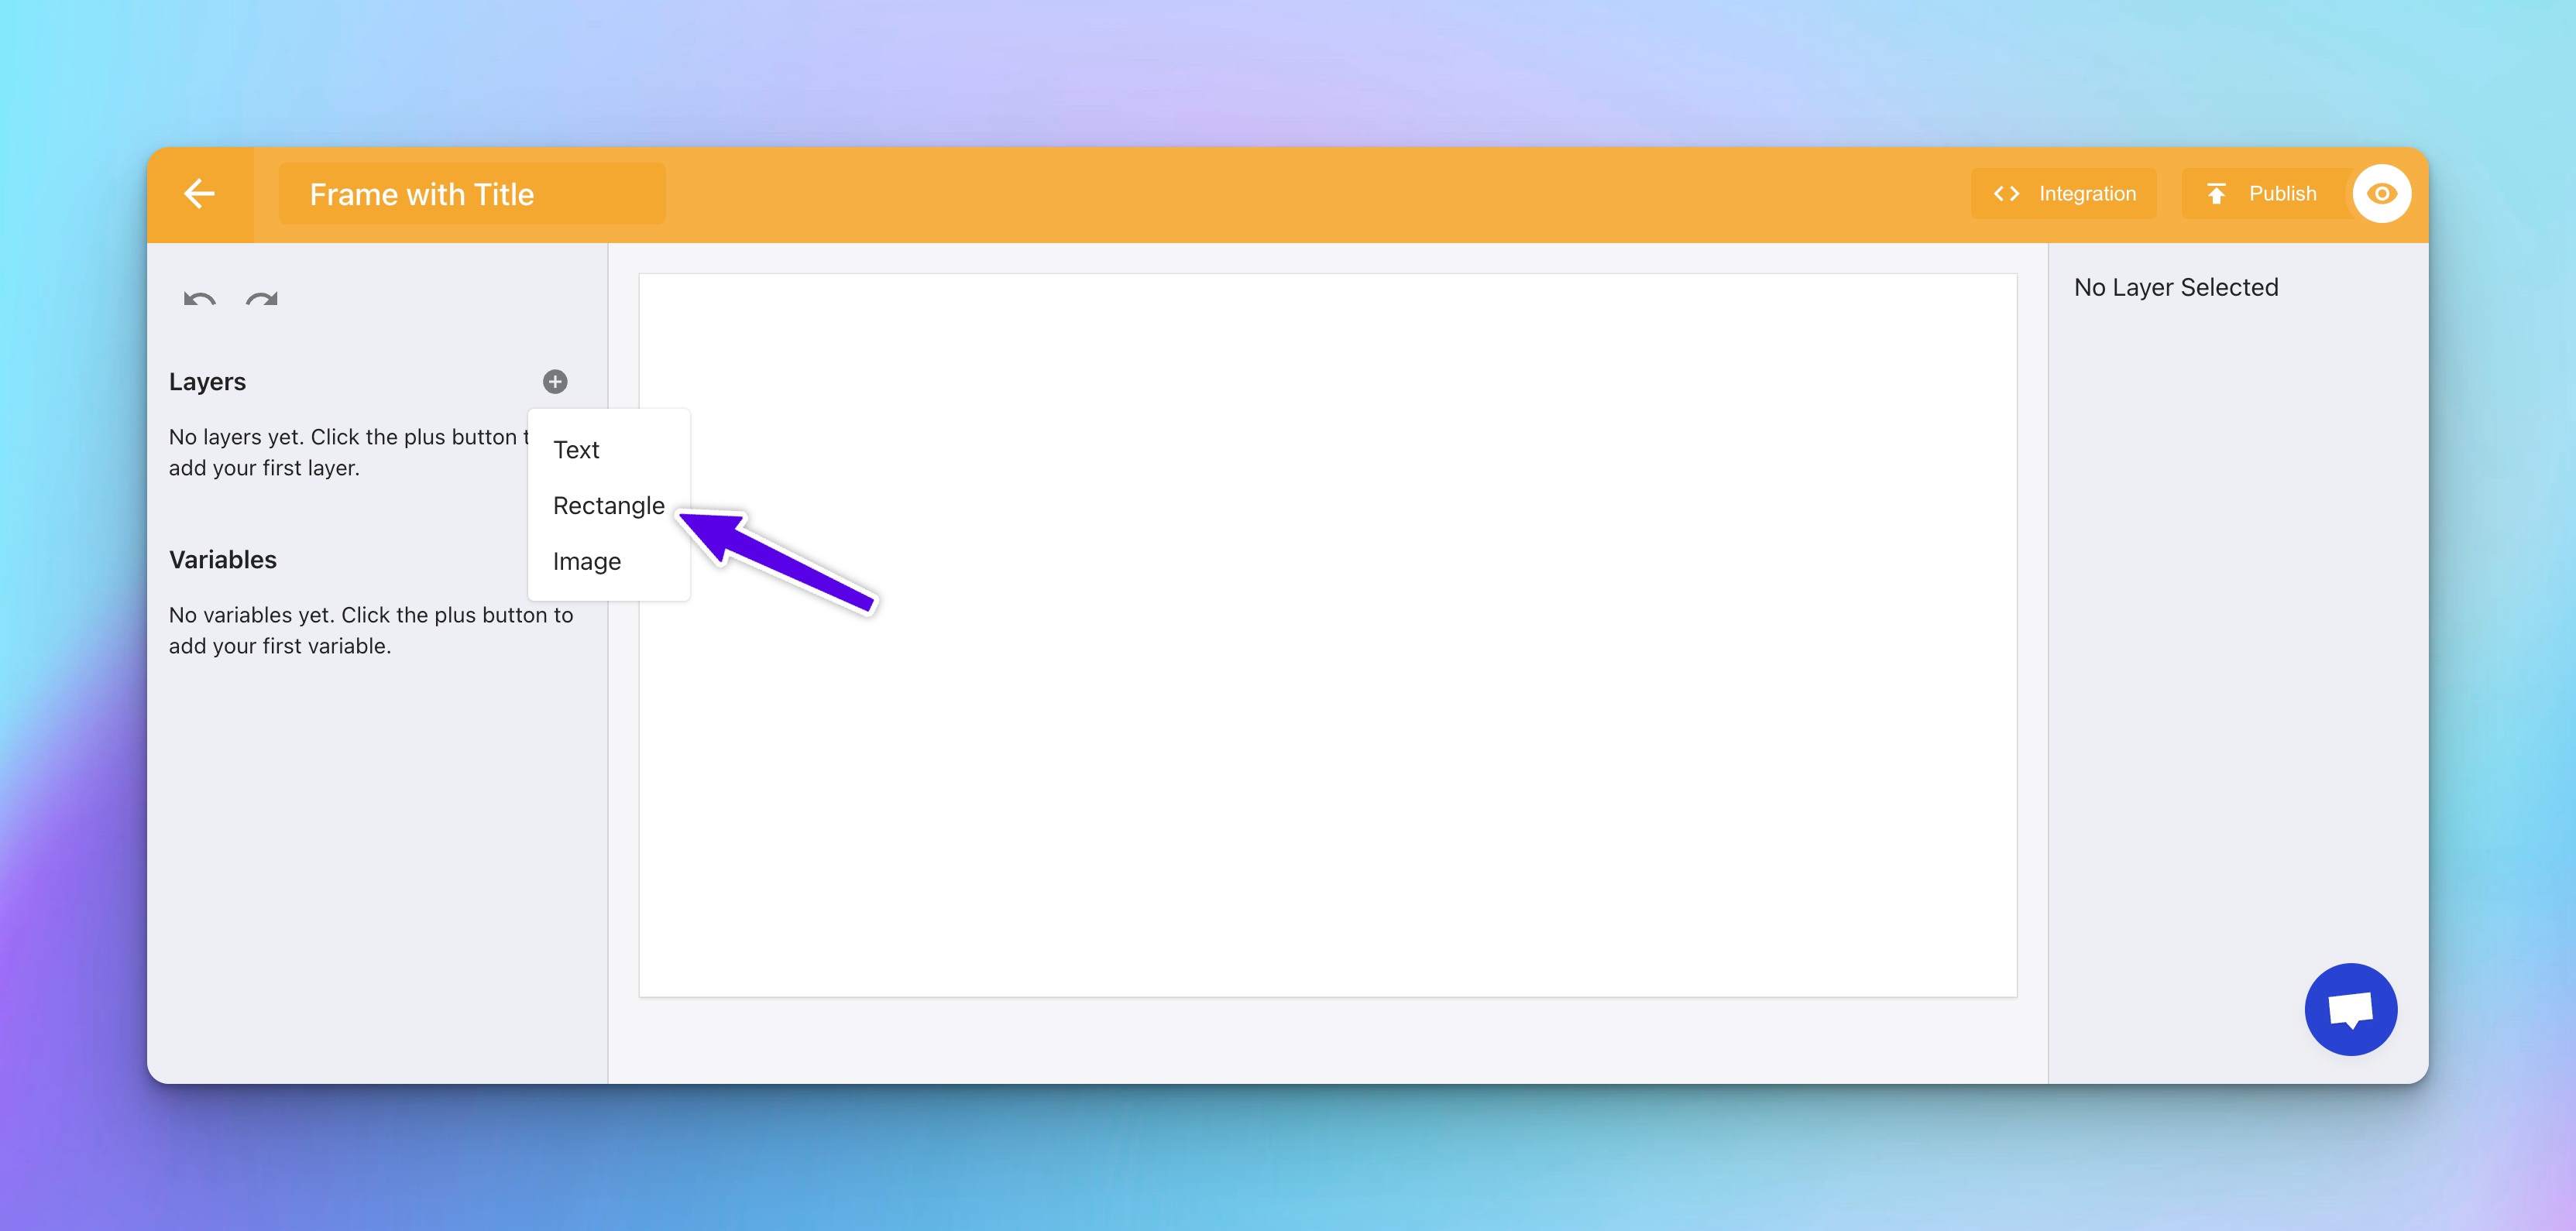
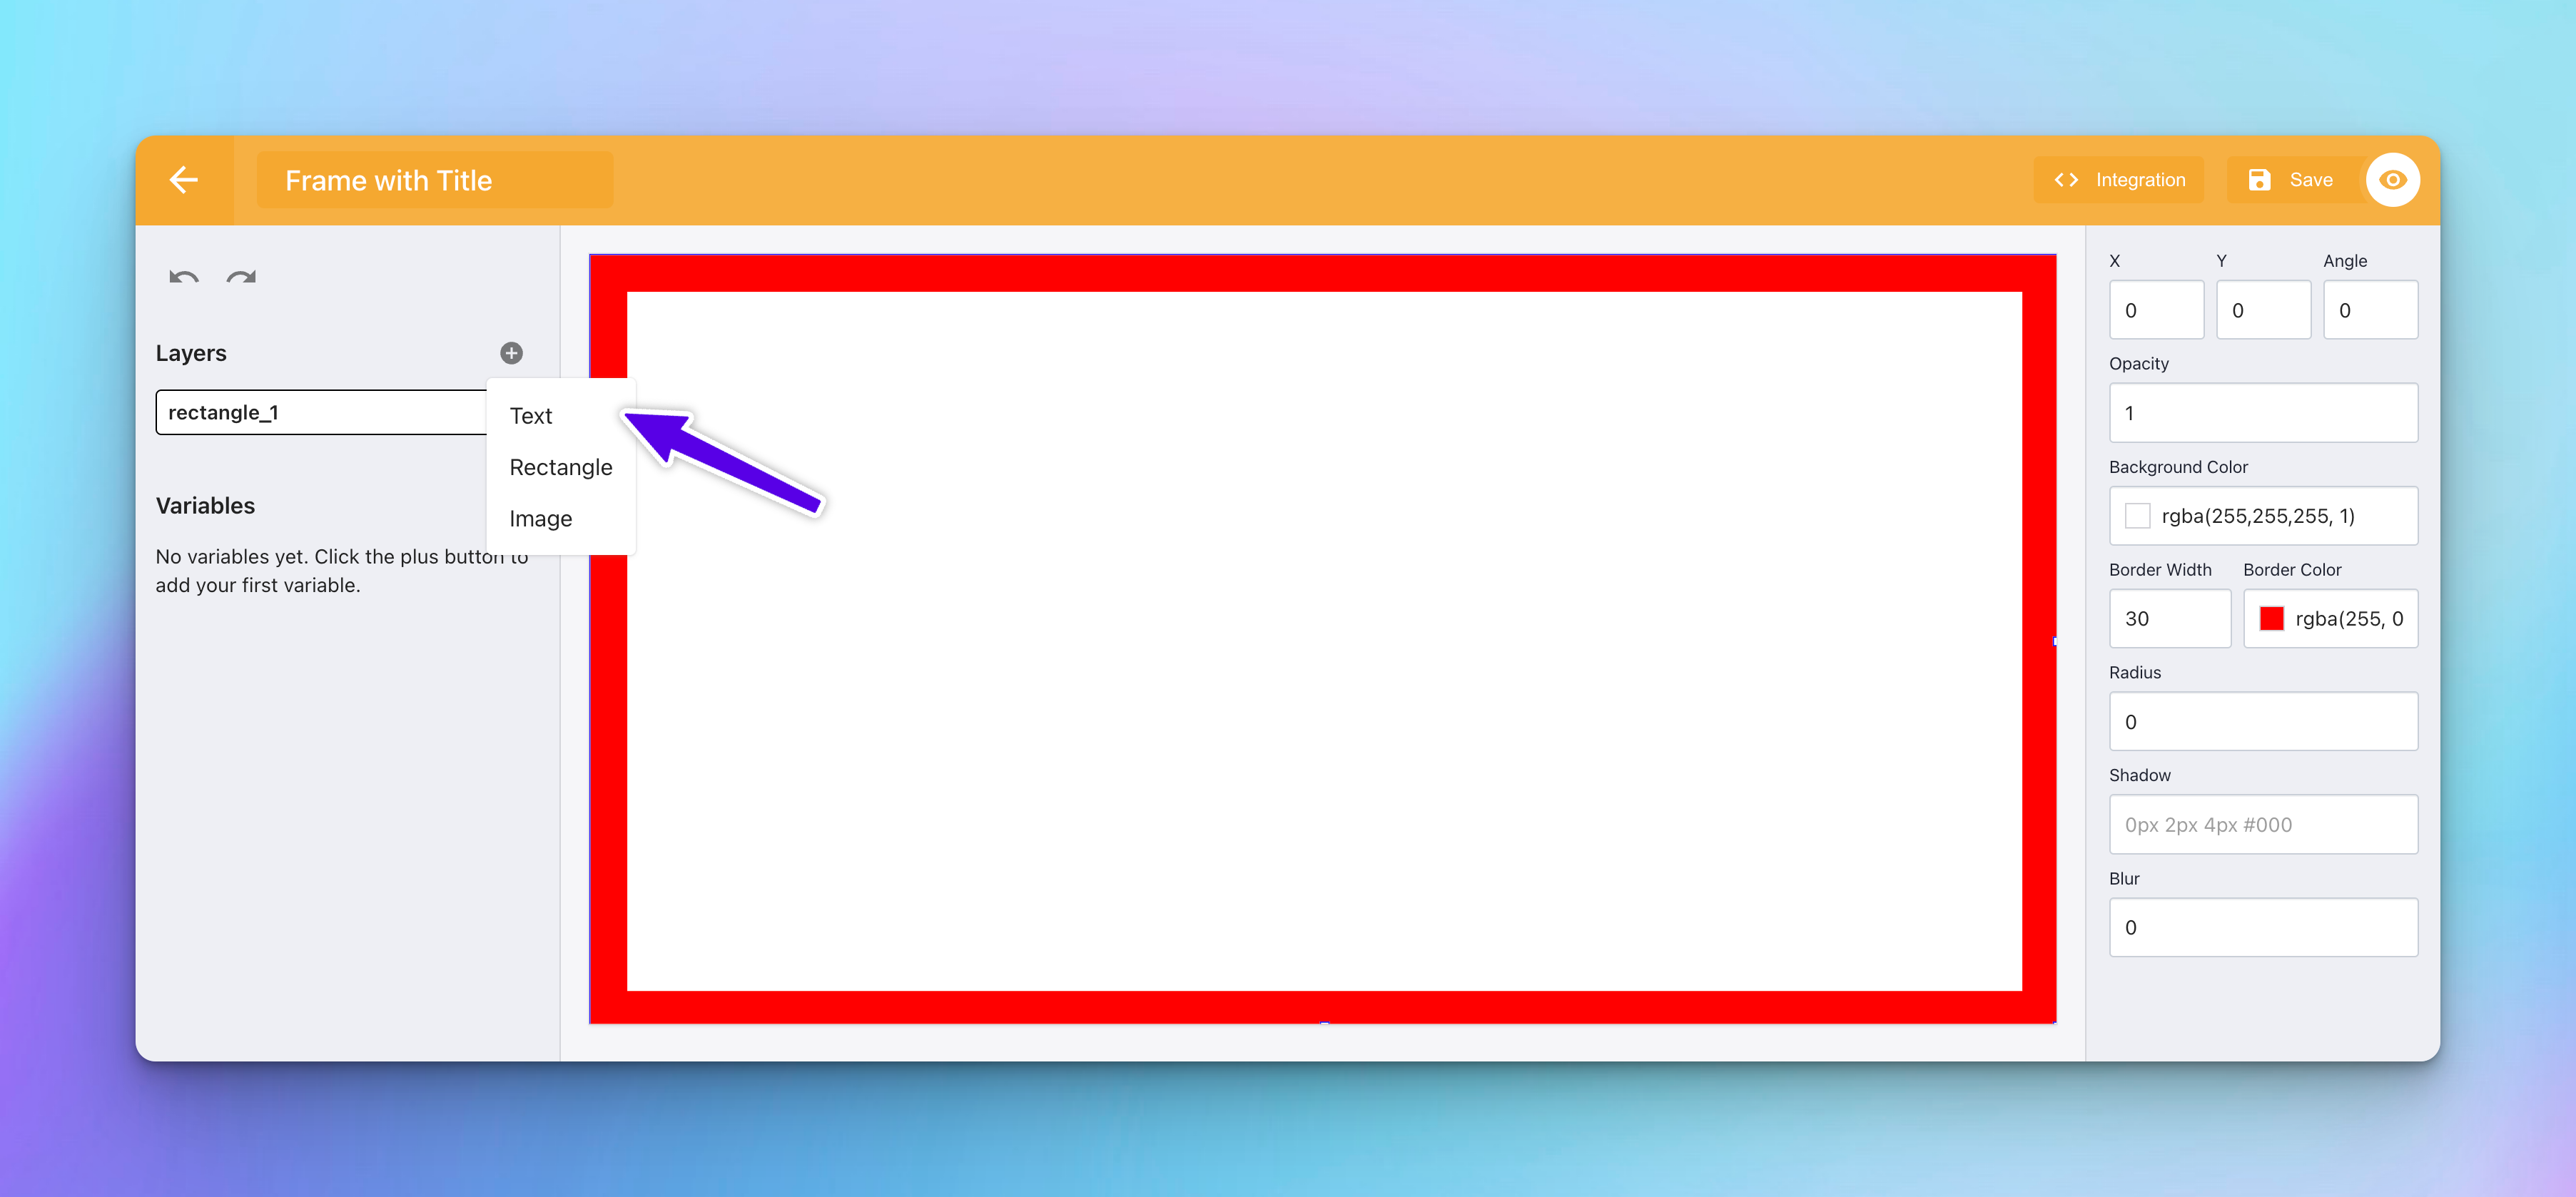
1. Initiate Rectangle Tool
- Click on the plus icon (+) on the sidebar located on the left side of the screen.
- Select the “Rectangle” option from the dropdown menu.
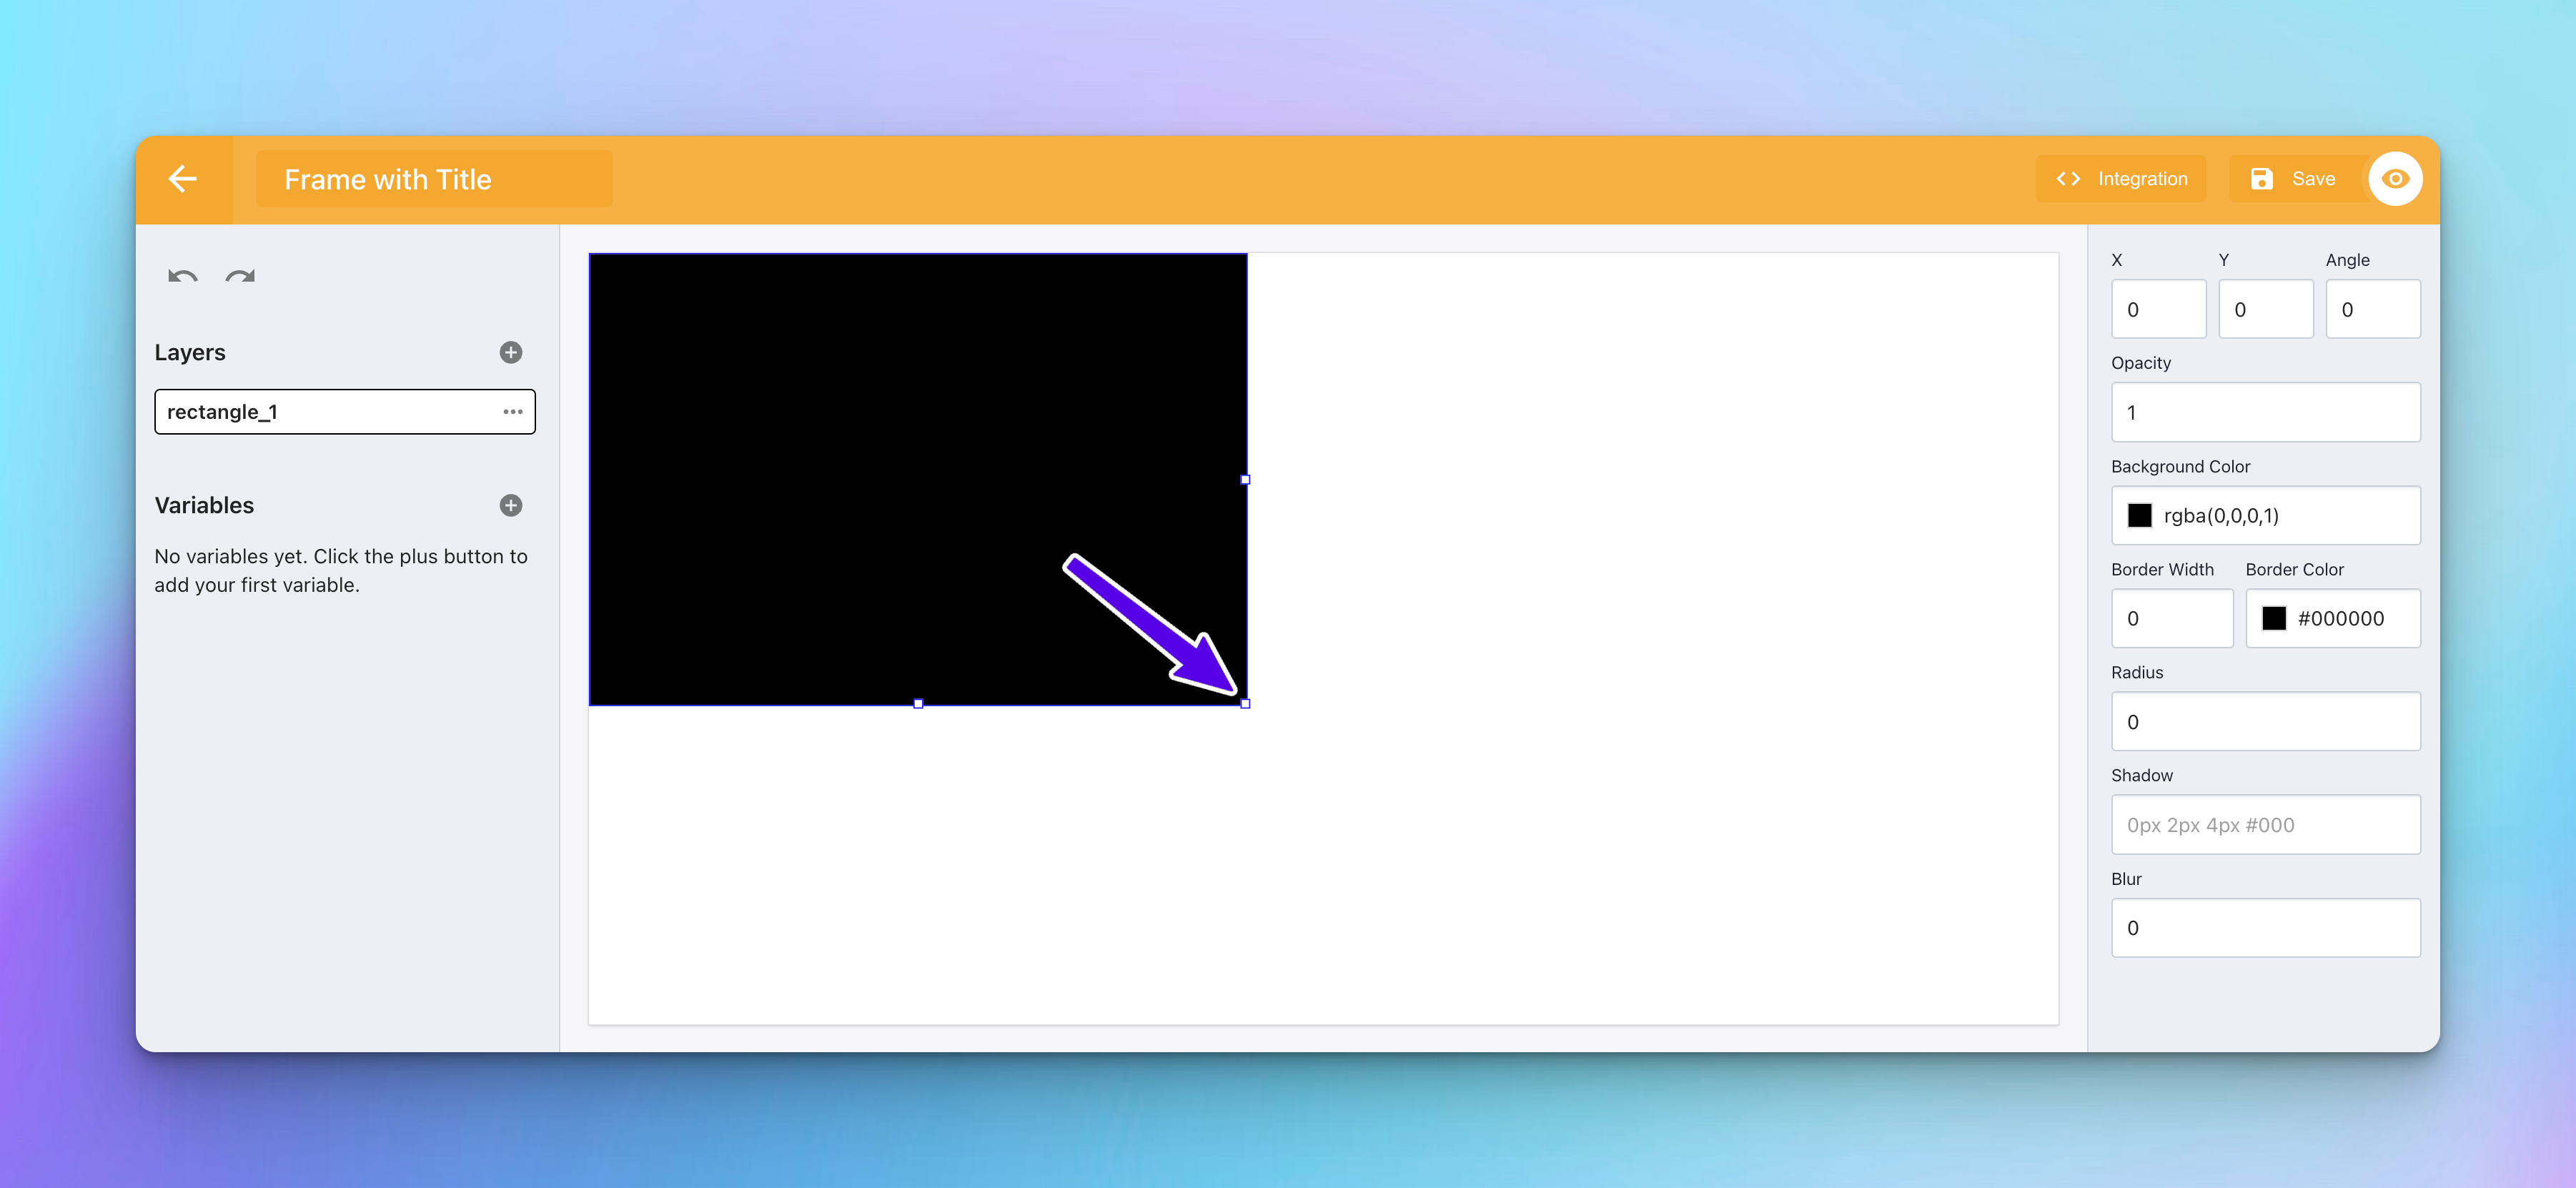
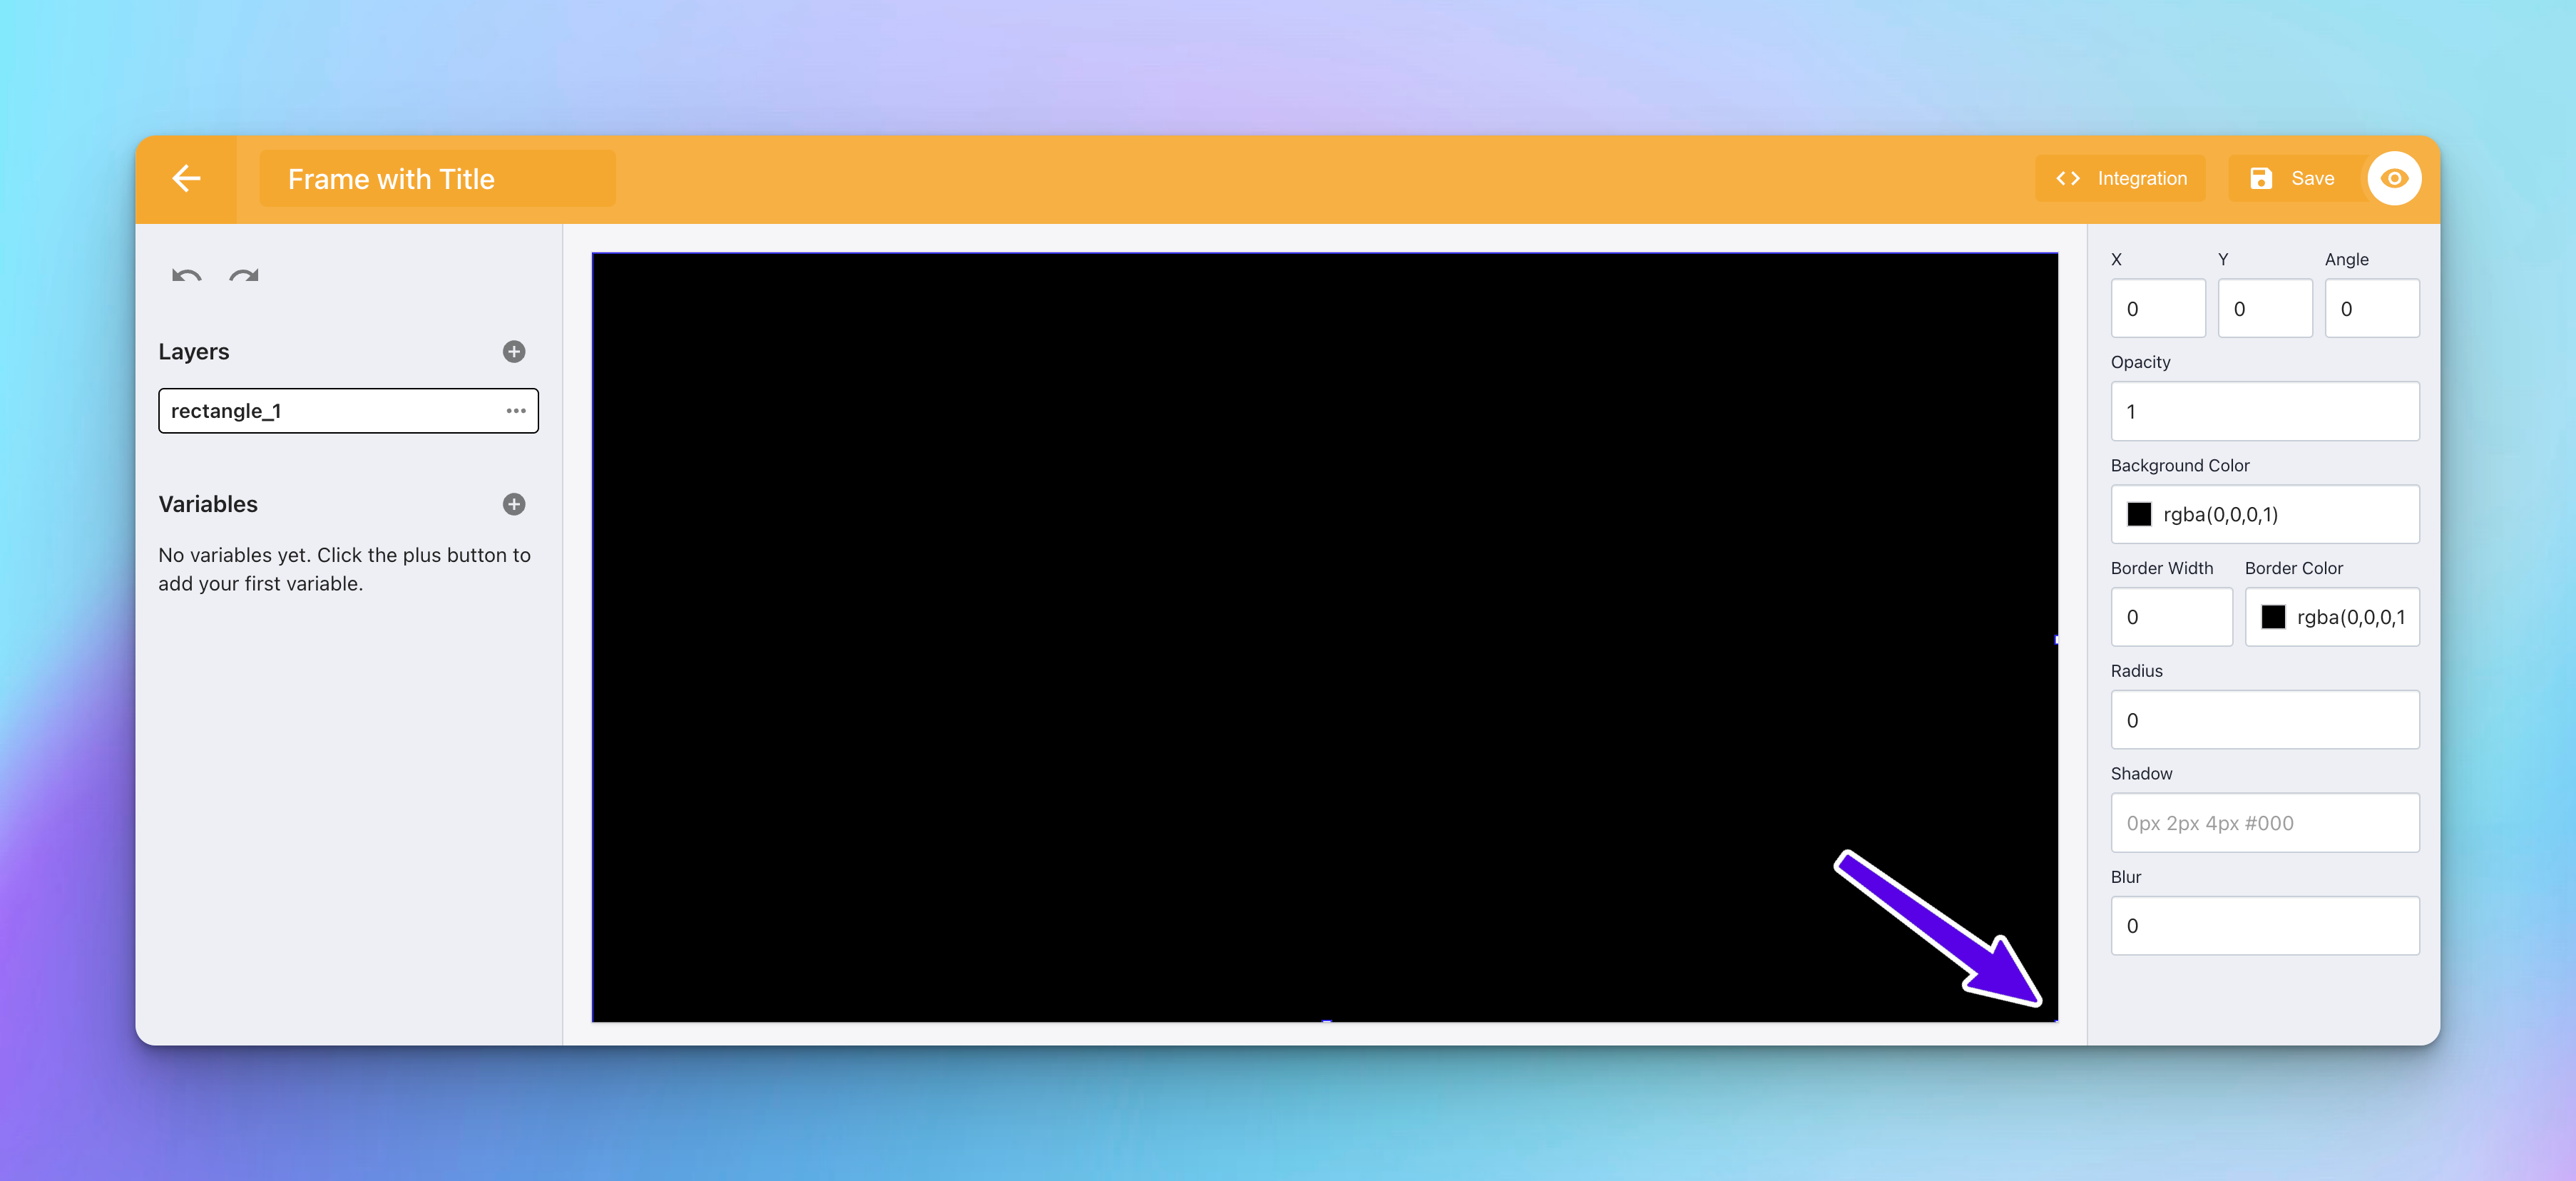
2. Adjust Rectangle Size
- Use the small squares (handles) on the edges of the rectangle to adjust its size.
- Expand it so that it covers the entire canvas.
3. Customize Border
- Navigate to the right sidebar to find border options.
- Set the “Border Width” to 30 to create a thick border.
- Change the “Border Color” to red for a bold look.

4. Set Background Color
- Still in the right sidebar, look for the “Background Color” option.
- Change it to white. This will fill the inner area of your frame, contrasting sharply with the red border.

Now that you have a colorful frame around the canvas, let’s add some textual content to your template.
Adding a Text Layer
Adding text to your template allows you to convey key messages or titles. Follow these steps to insert a text layer:
1. Access the Text Tool
- Click on the plus icon (+) on the left sidebar again.
- This time, select “Text” from the options.
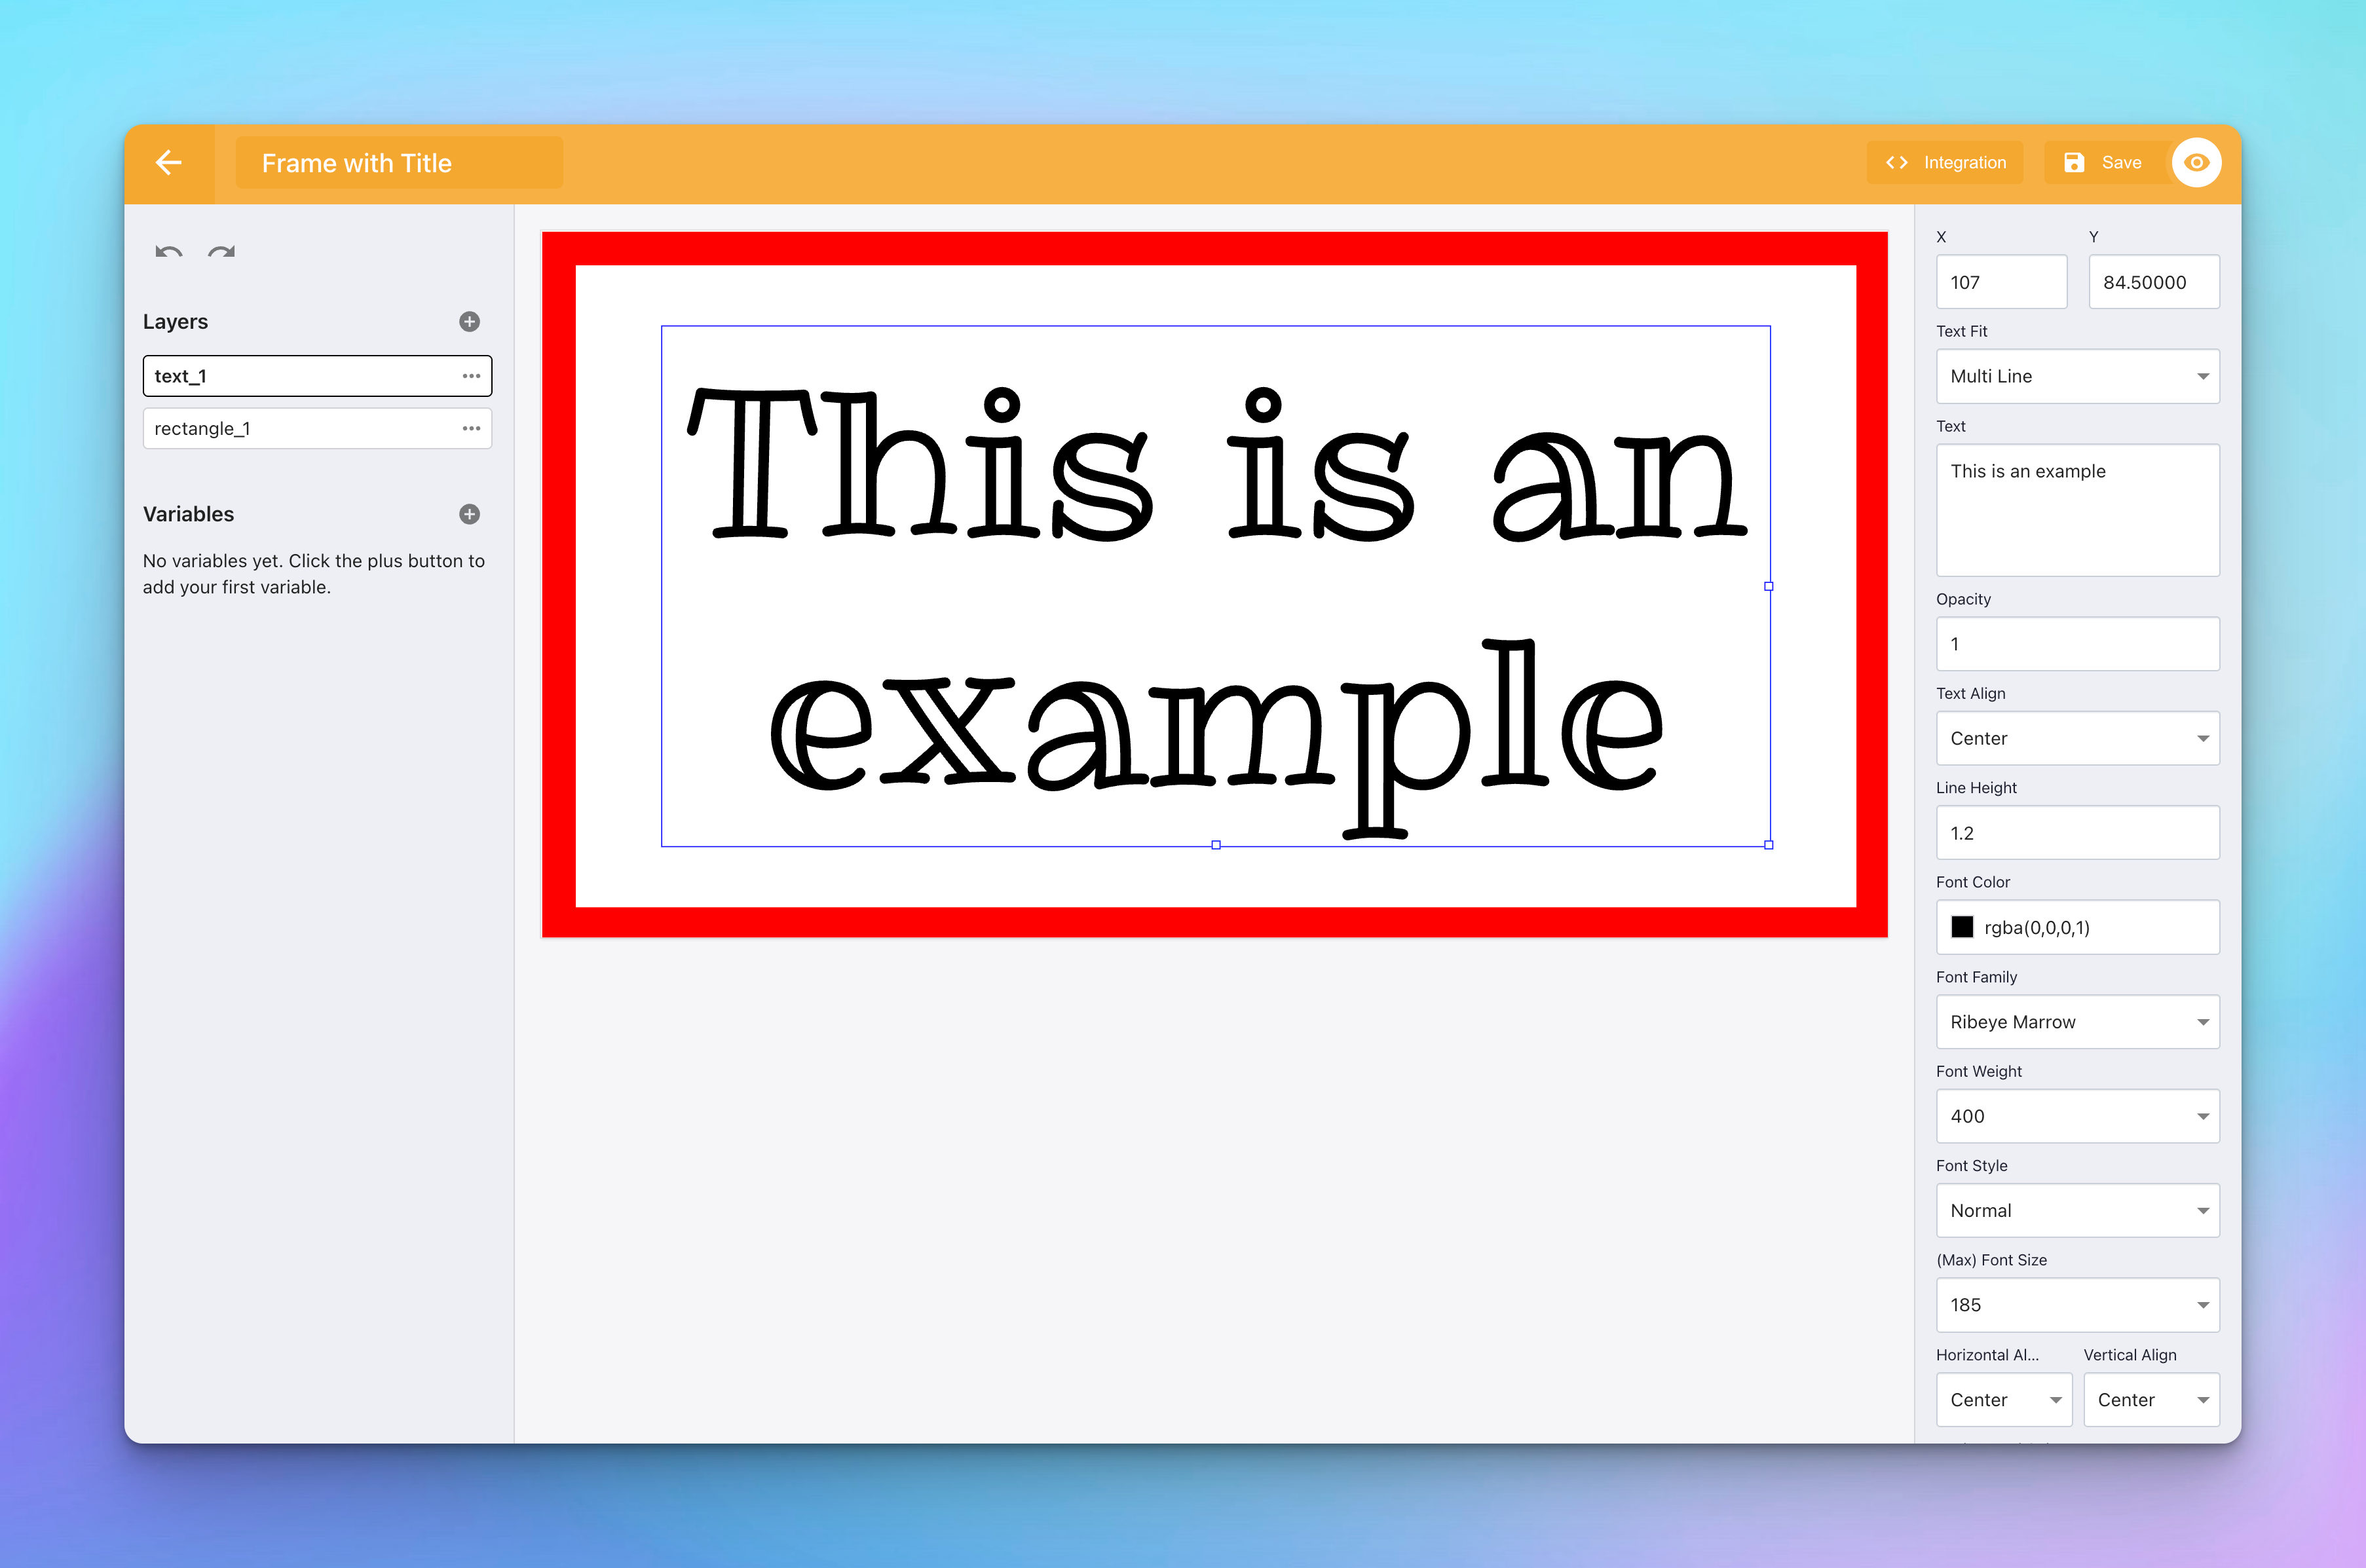
2. Adjusting Text Size
- Use the small squares (handles) on the edges of the text box to adjust its size.
- Expand or contract the text box so that the text occupies most of the canvas space, again leaving a clear margin between the text and the frame border for a clean look.
3. Changing Font Family
- In the text editing options, look for the “Font Family” dropdown.
- Select “Ribeye Marrow” from the list to apply this distinctive font to your text.
4. Aligning Text
- Set both the Horizontal and Vertical Align options to "Center". This ensures your text is perfectly centered within the text box and the frame.
- For the Text Align setting, also choose "center". This adjustment ensures that if your text spans multiple lines, each line is aligned to the center.
5. Setting Max Font Size
- Find the option for “(Max) Font Size” and set it to 185. This will make your text large and legible, capturing attention while fitting neatly within your designed frame.
Step 3: Leveraging Variables for Dynamic Templates
Variables in the OpenGraph.xyz Template Editor are dynamic placeholders that allow specific elements of your OG image to change based on the data they're linked to. Whether it’s text content, colors, or images, variables ensure your OG images are personalized for each share.
Attaching Layers to Variables
To make your template truly dynamic, let's attach both the text and rectangle layers to variables. This process enables these elements to change dynamically when the template is used.
Attaching the Text Layer to a Variable
- Select the Text Layer: Click on your text layer to select it.
- Attach to Variable: Click on the three dots menu associated with the layer. Look for the option to “Attach to Variable” and click on it.
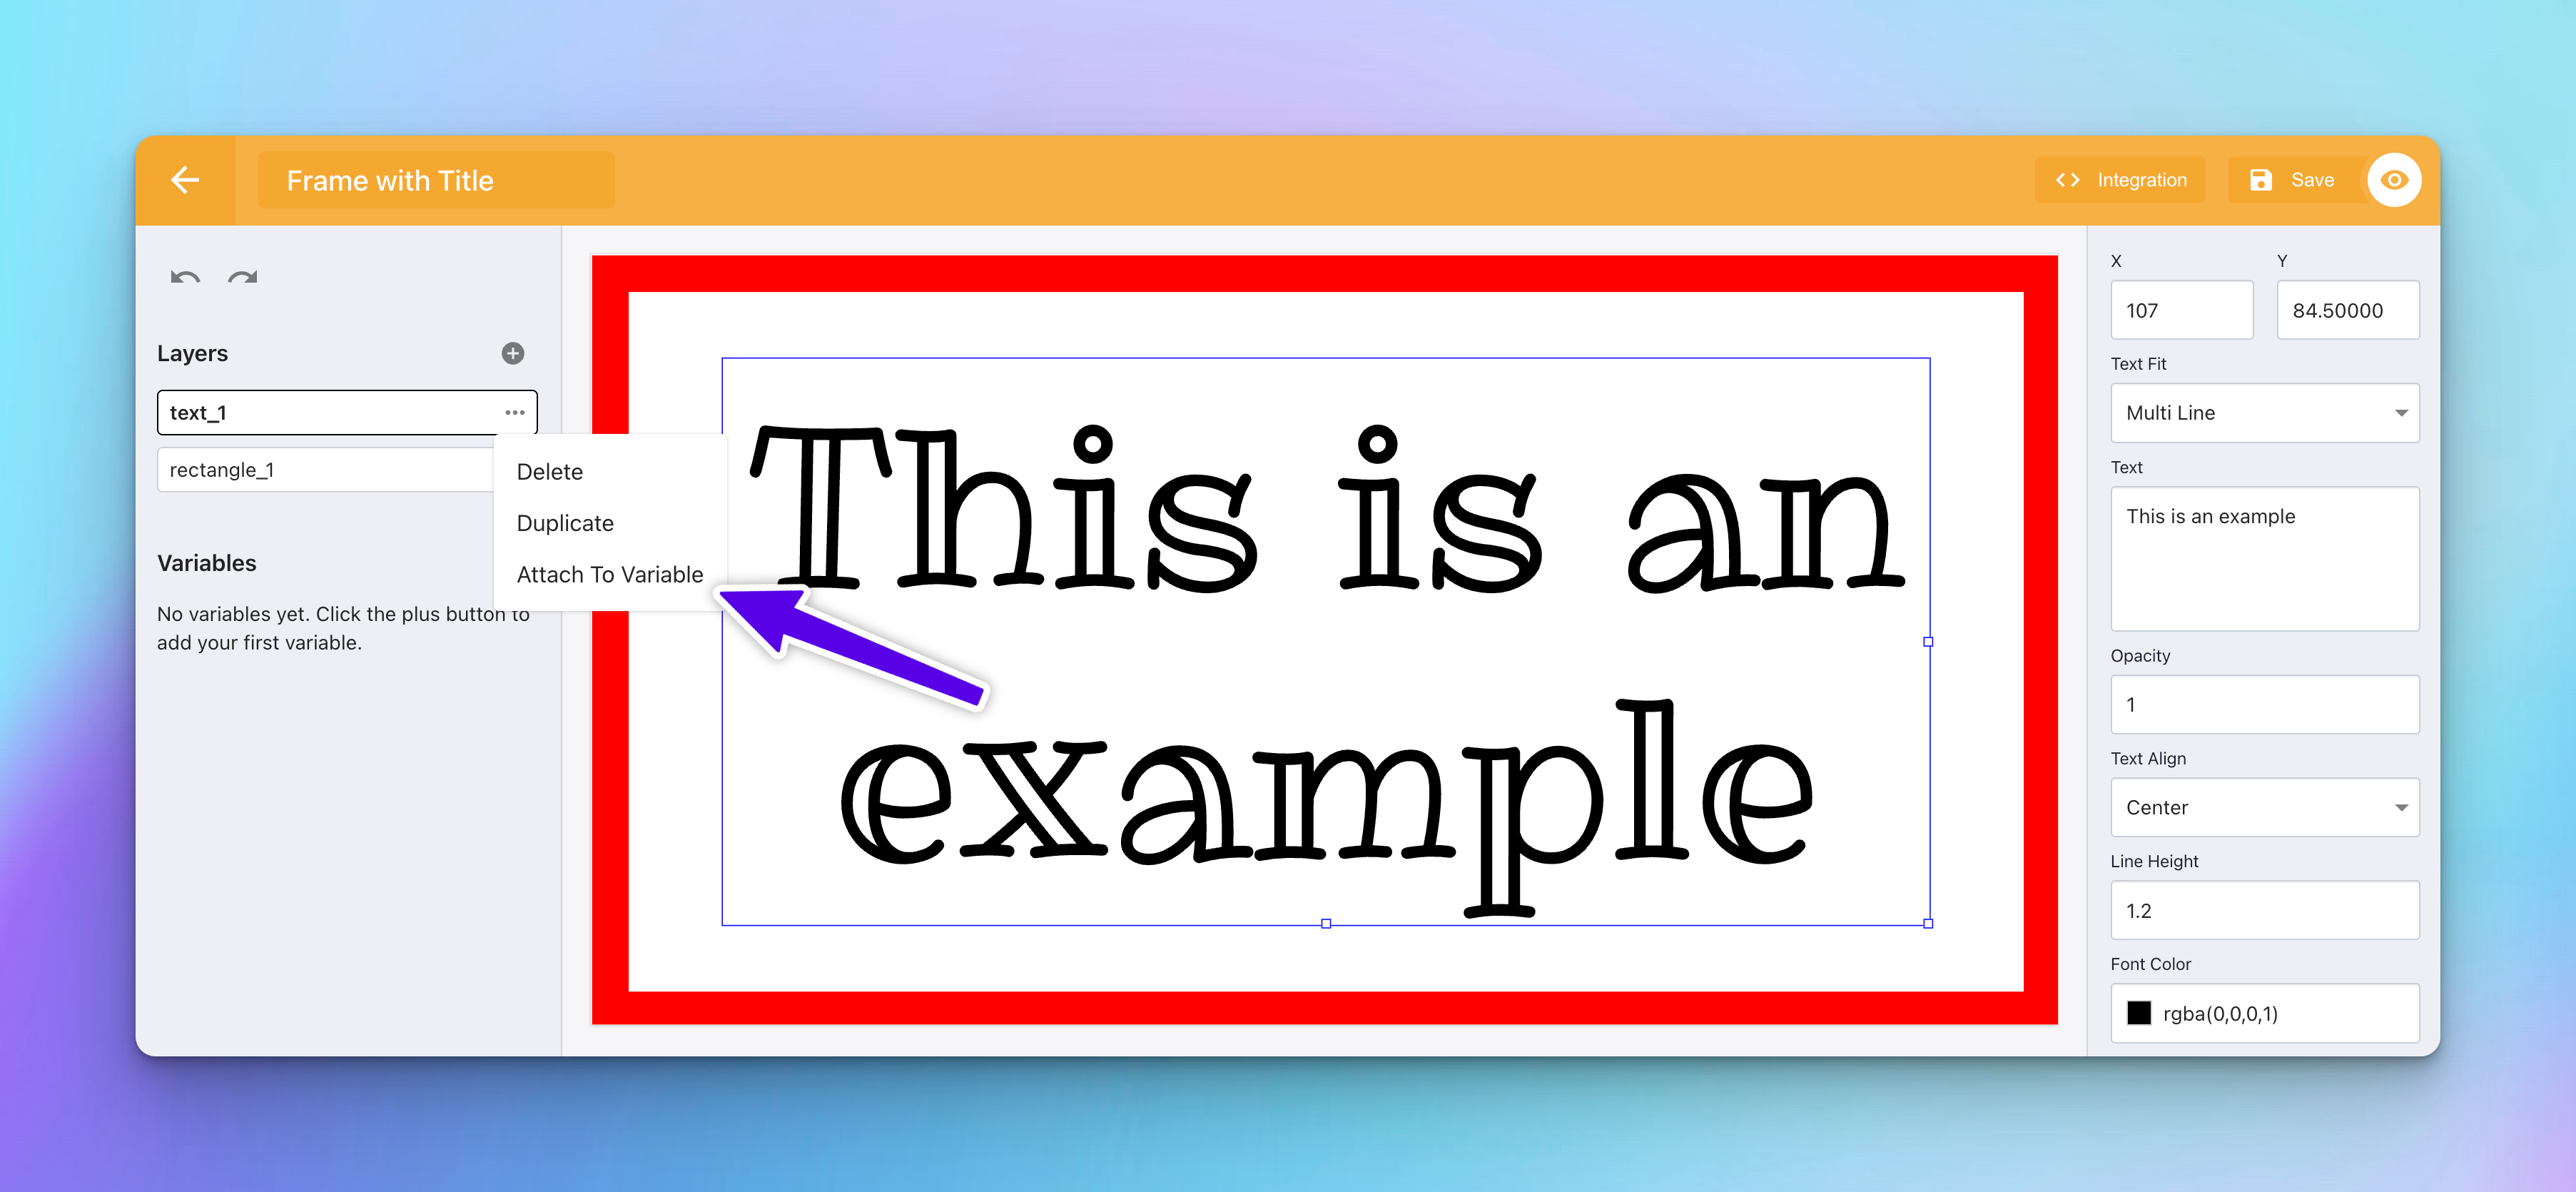
- Create a Variable: Choose “Create New Variable”. Give your variable an ID, like
title, and a descriptive name.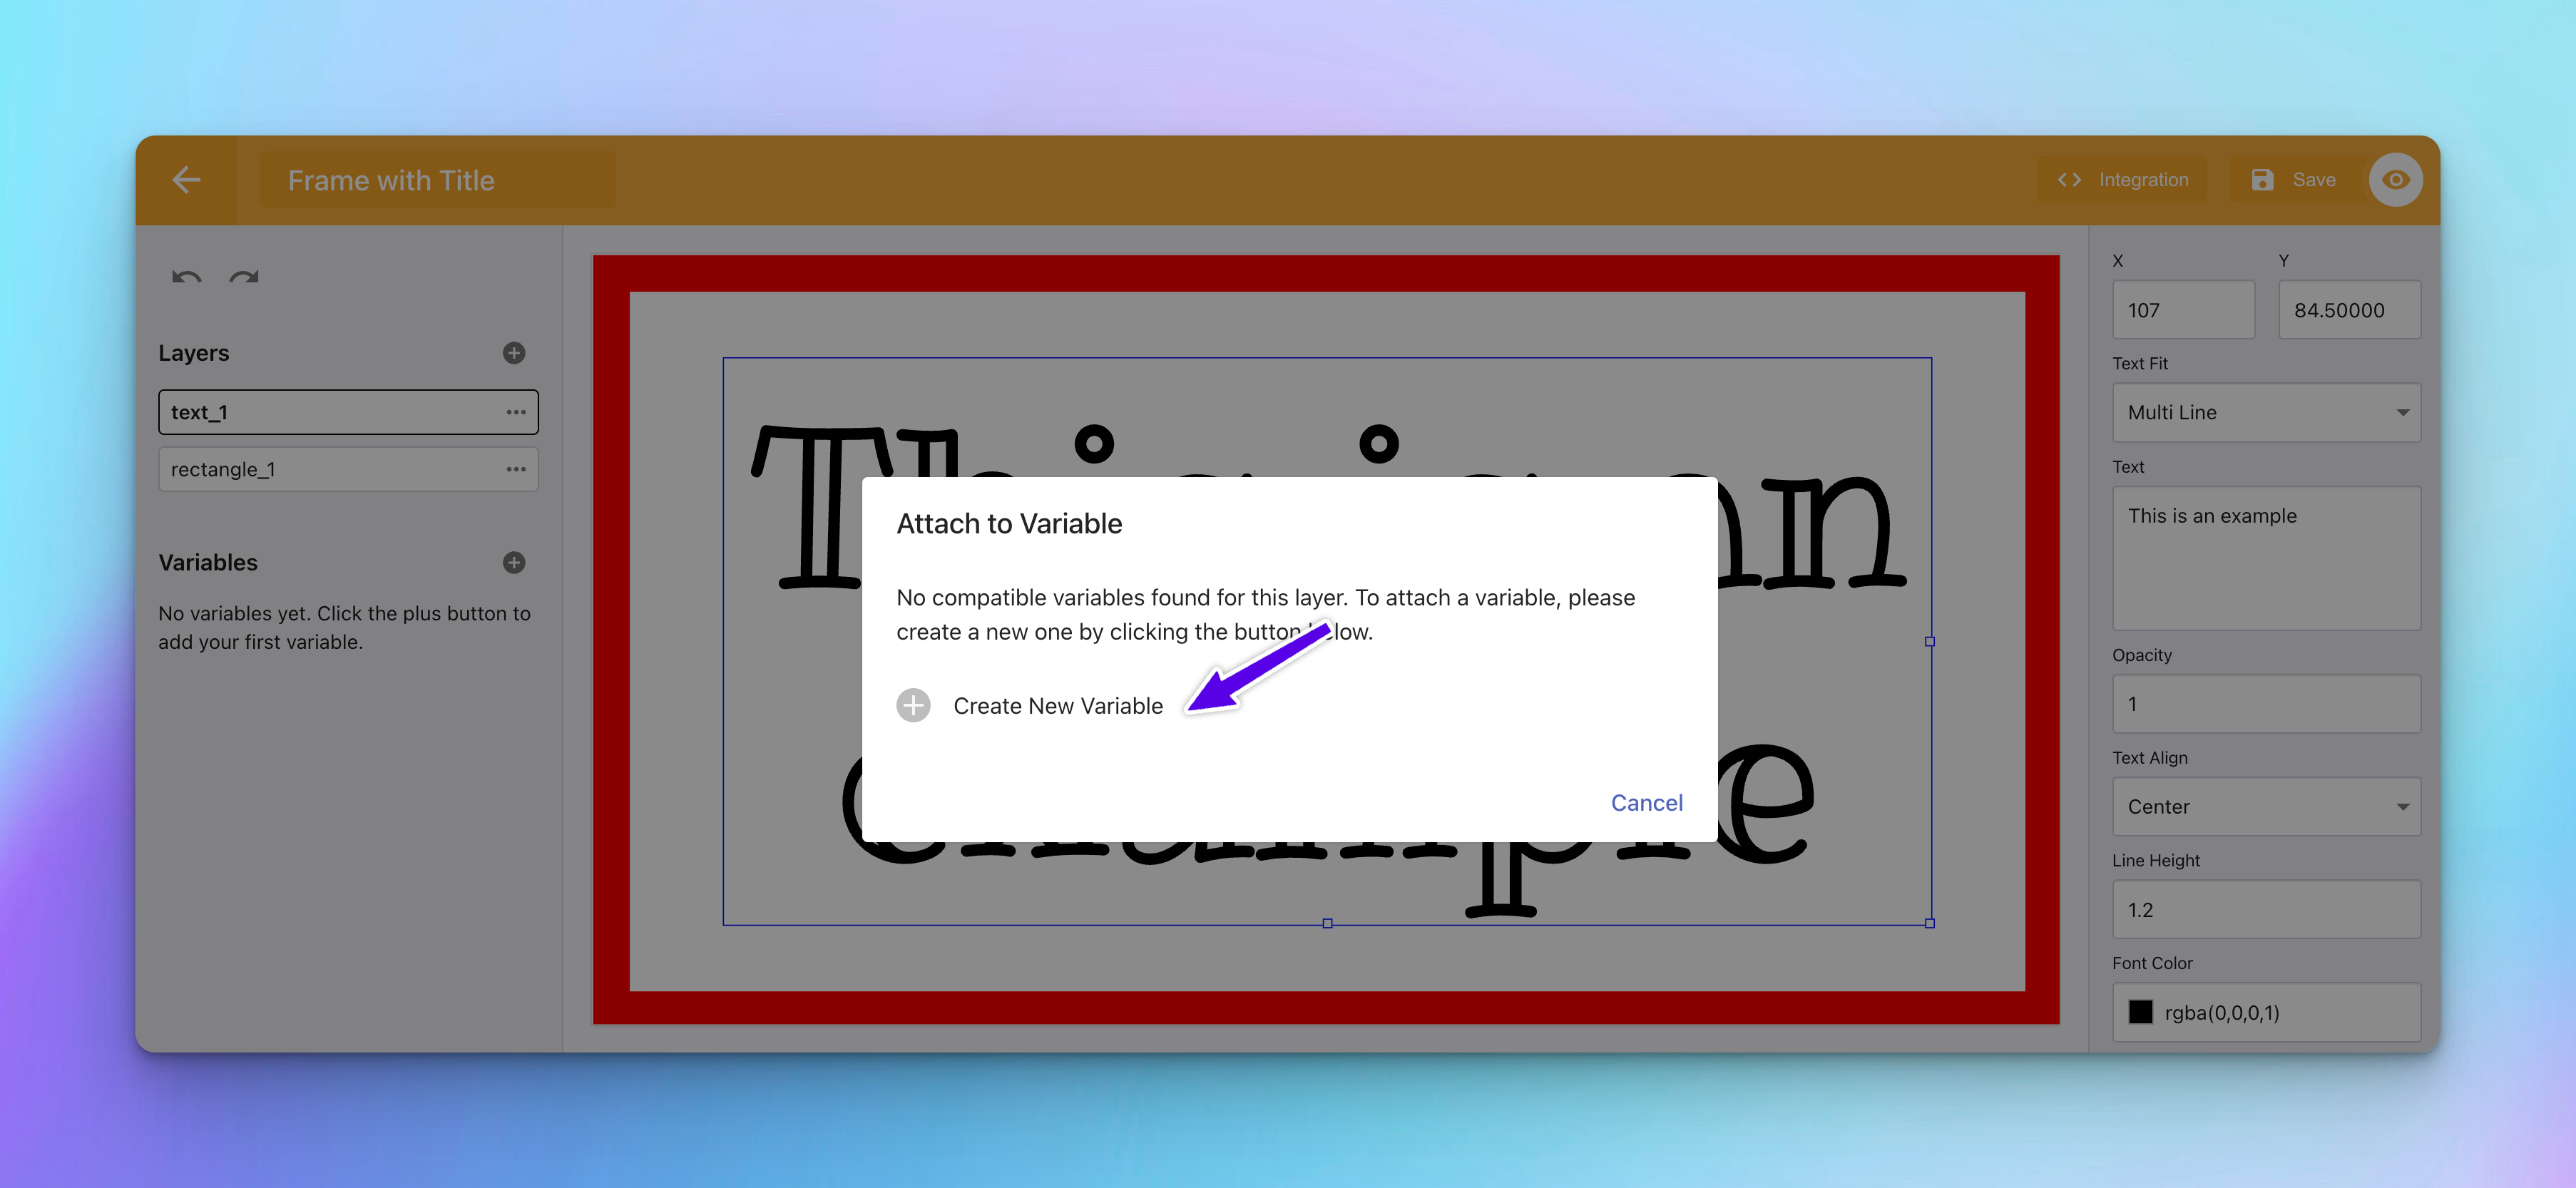
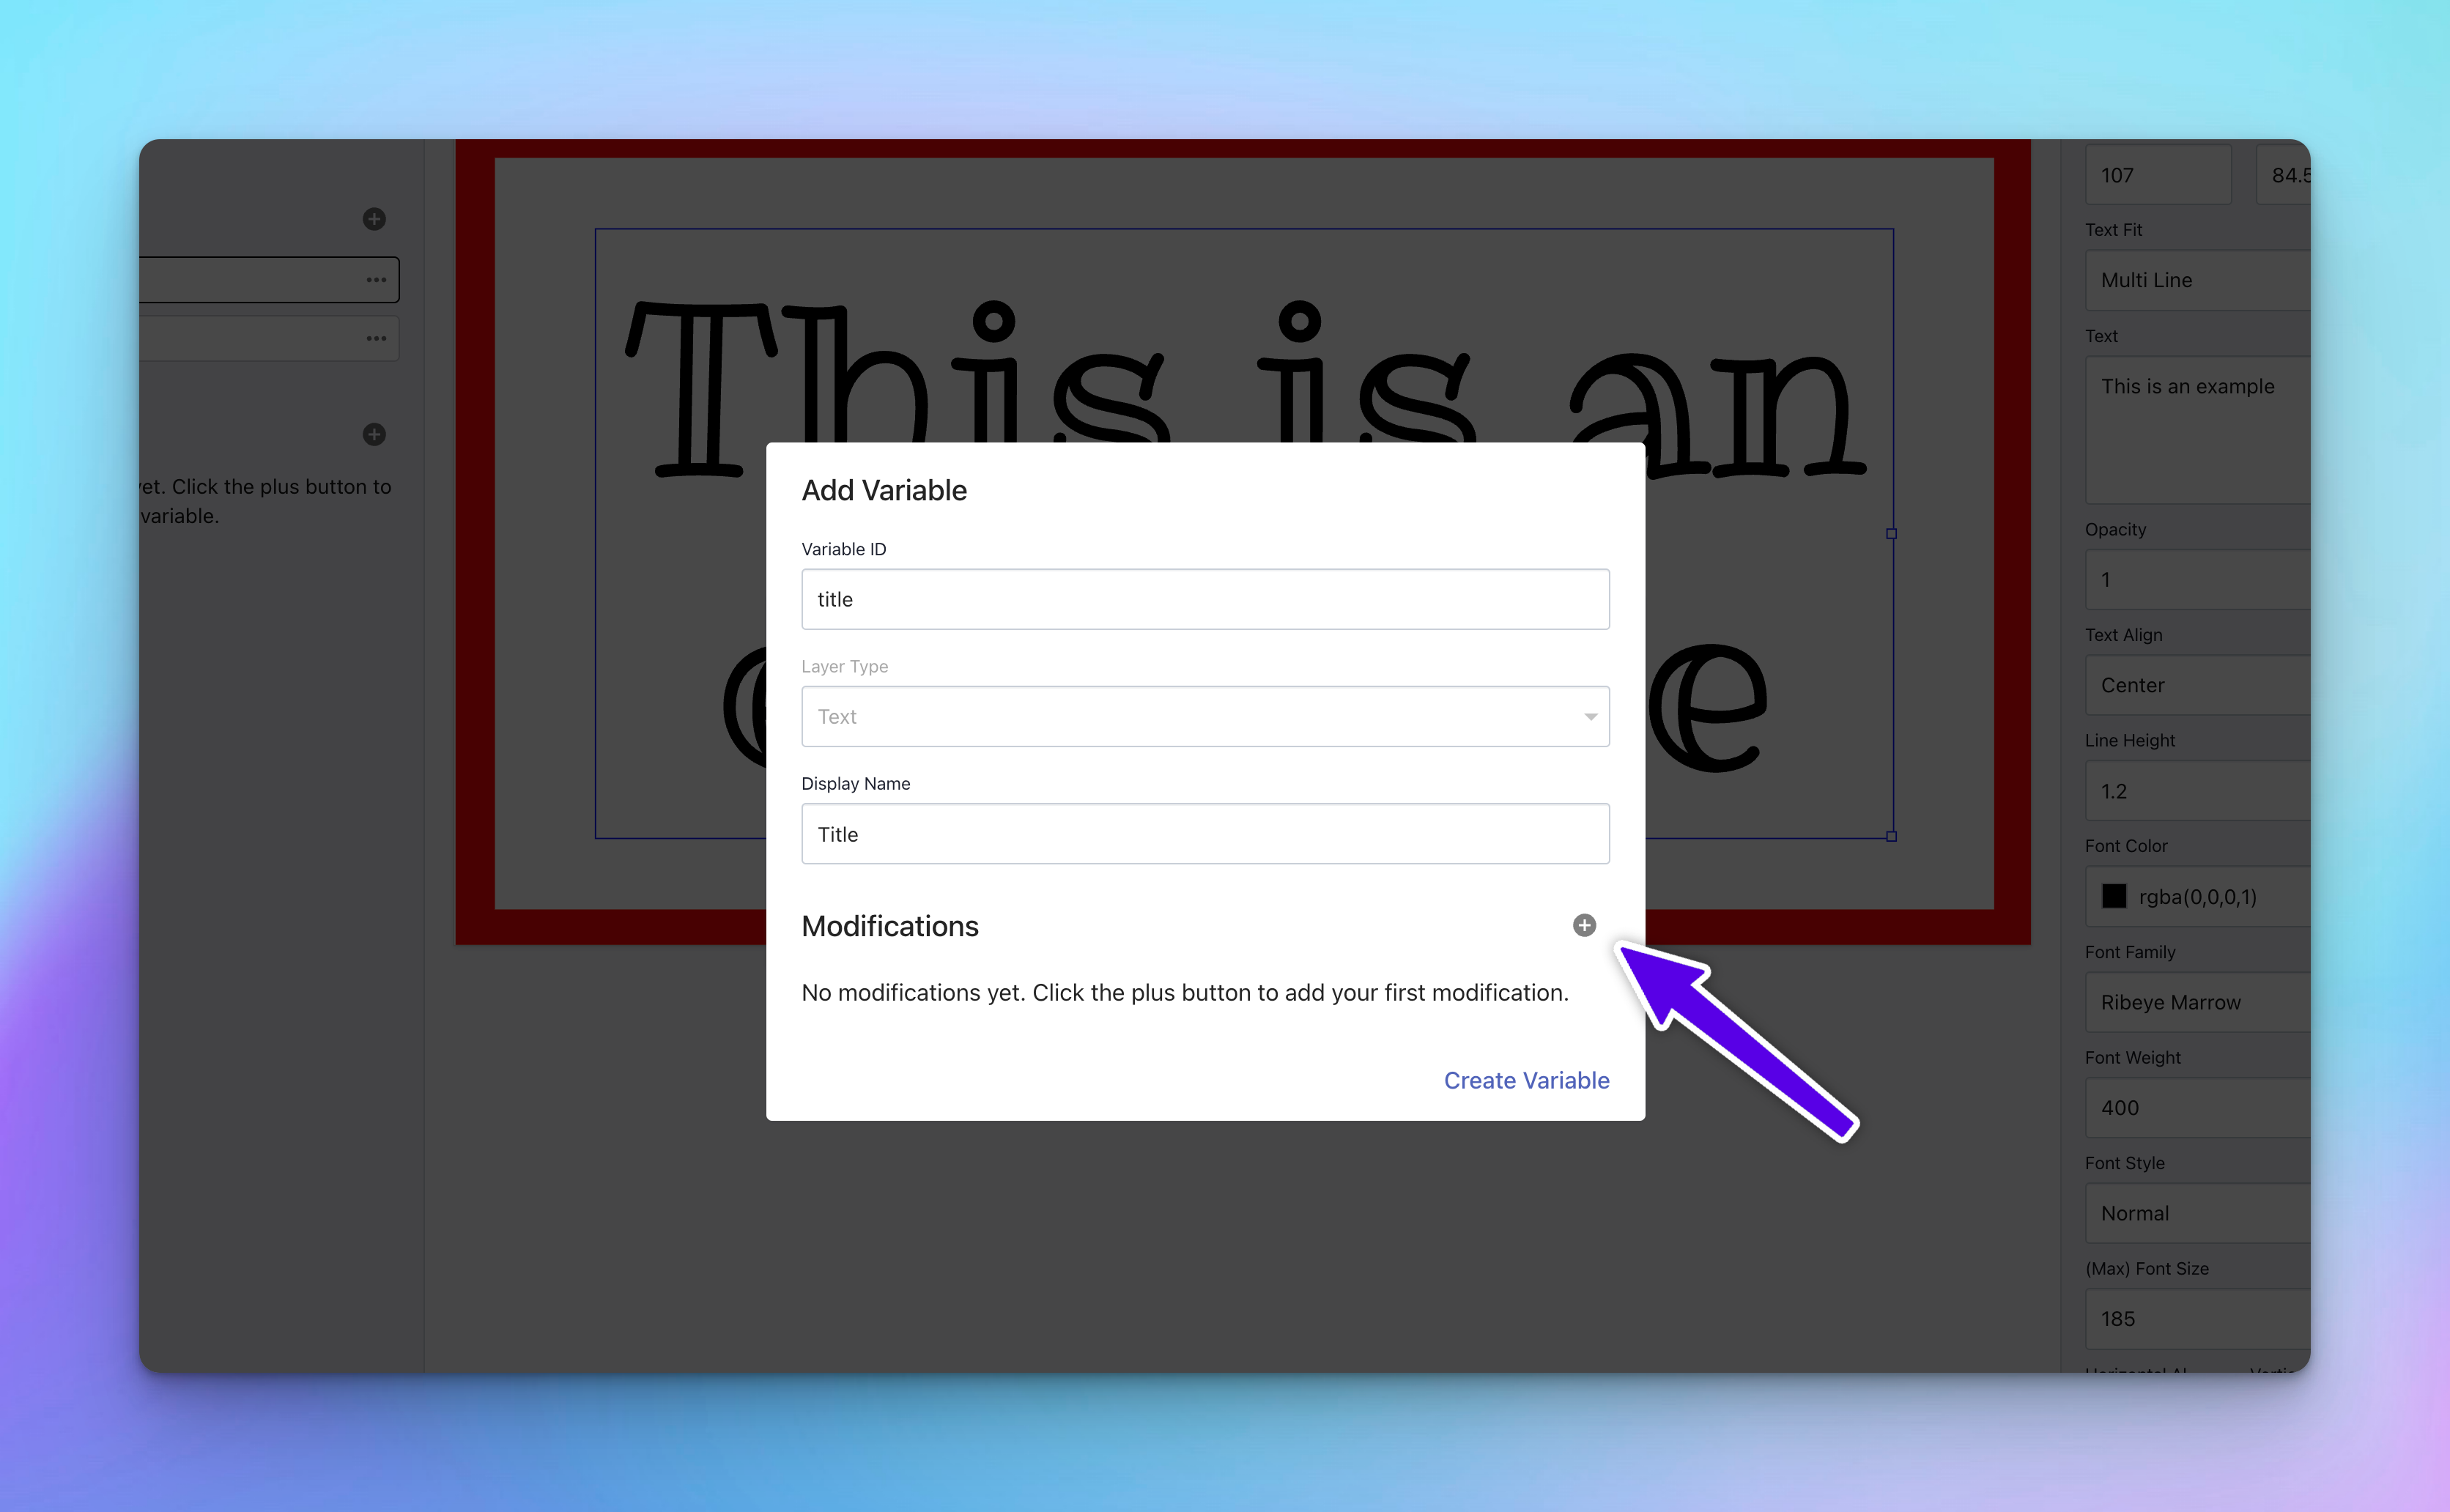
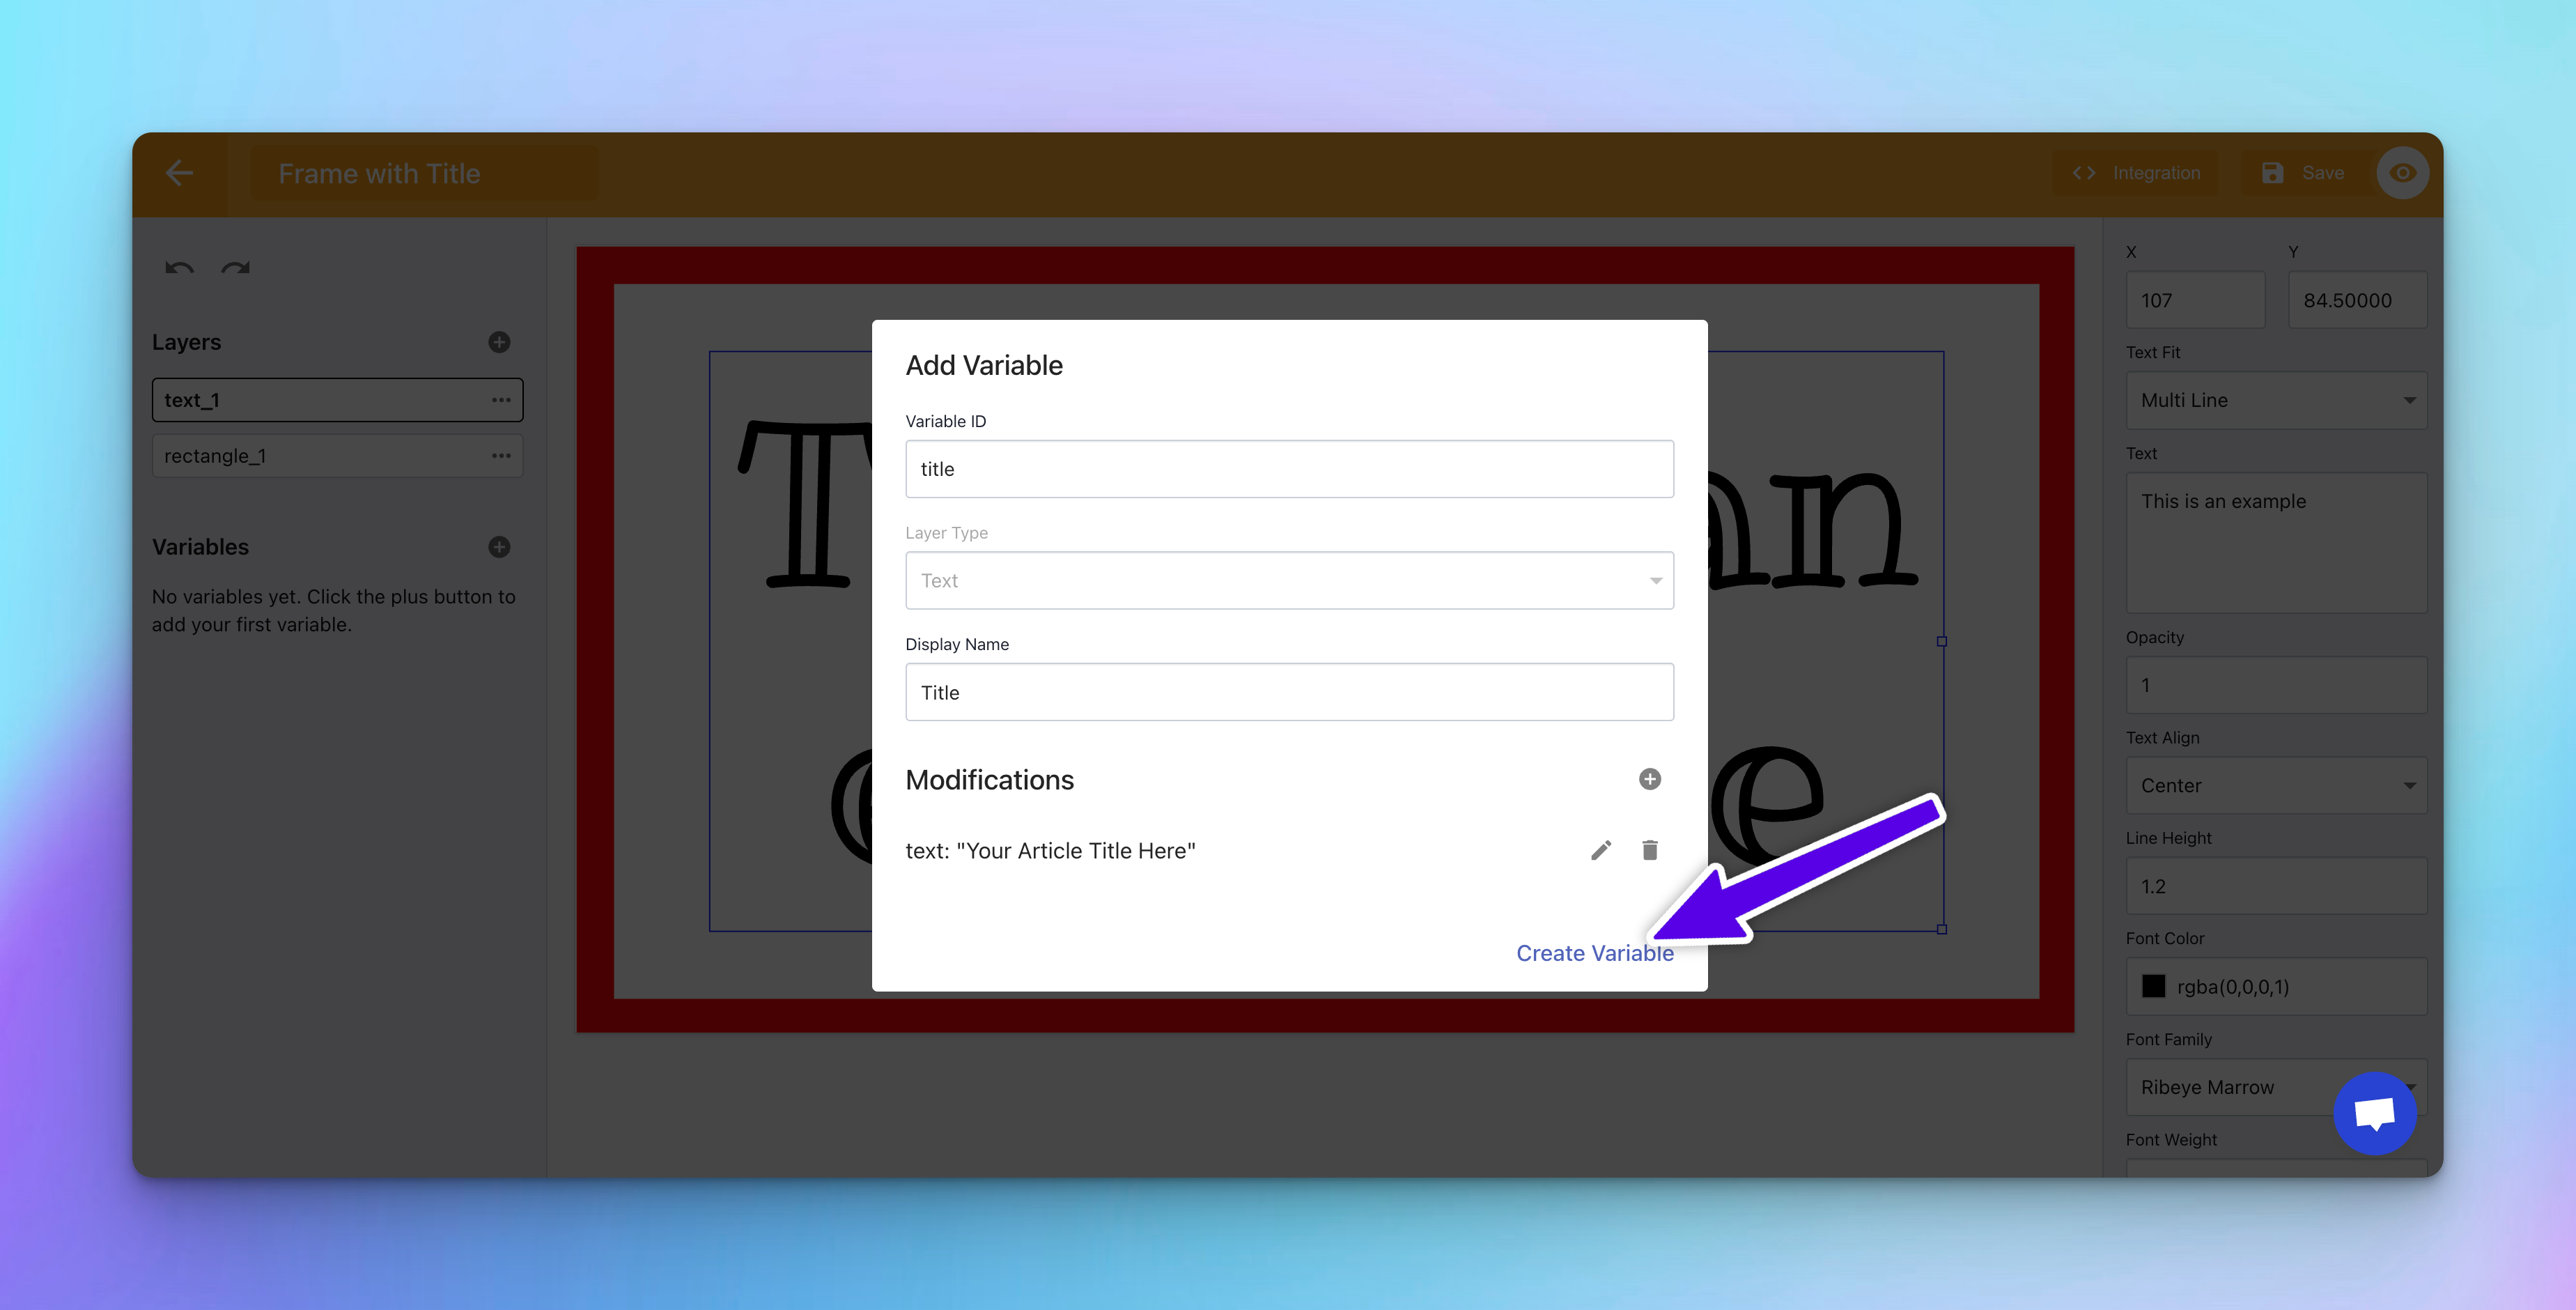
In the variable setup screen, locate the "Modifications" section. This area allows you to dictate which aspects of the attached layer will be dynamic.
Adding a Modification: Click on the "+" icon within the "Modifications" section to open a list of possible adjustments applicable to the layer type.
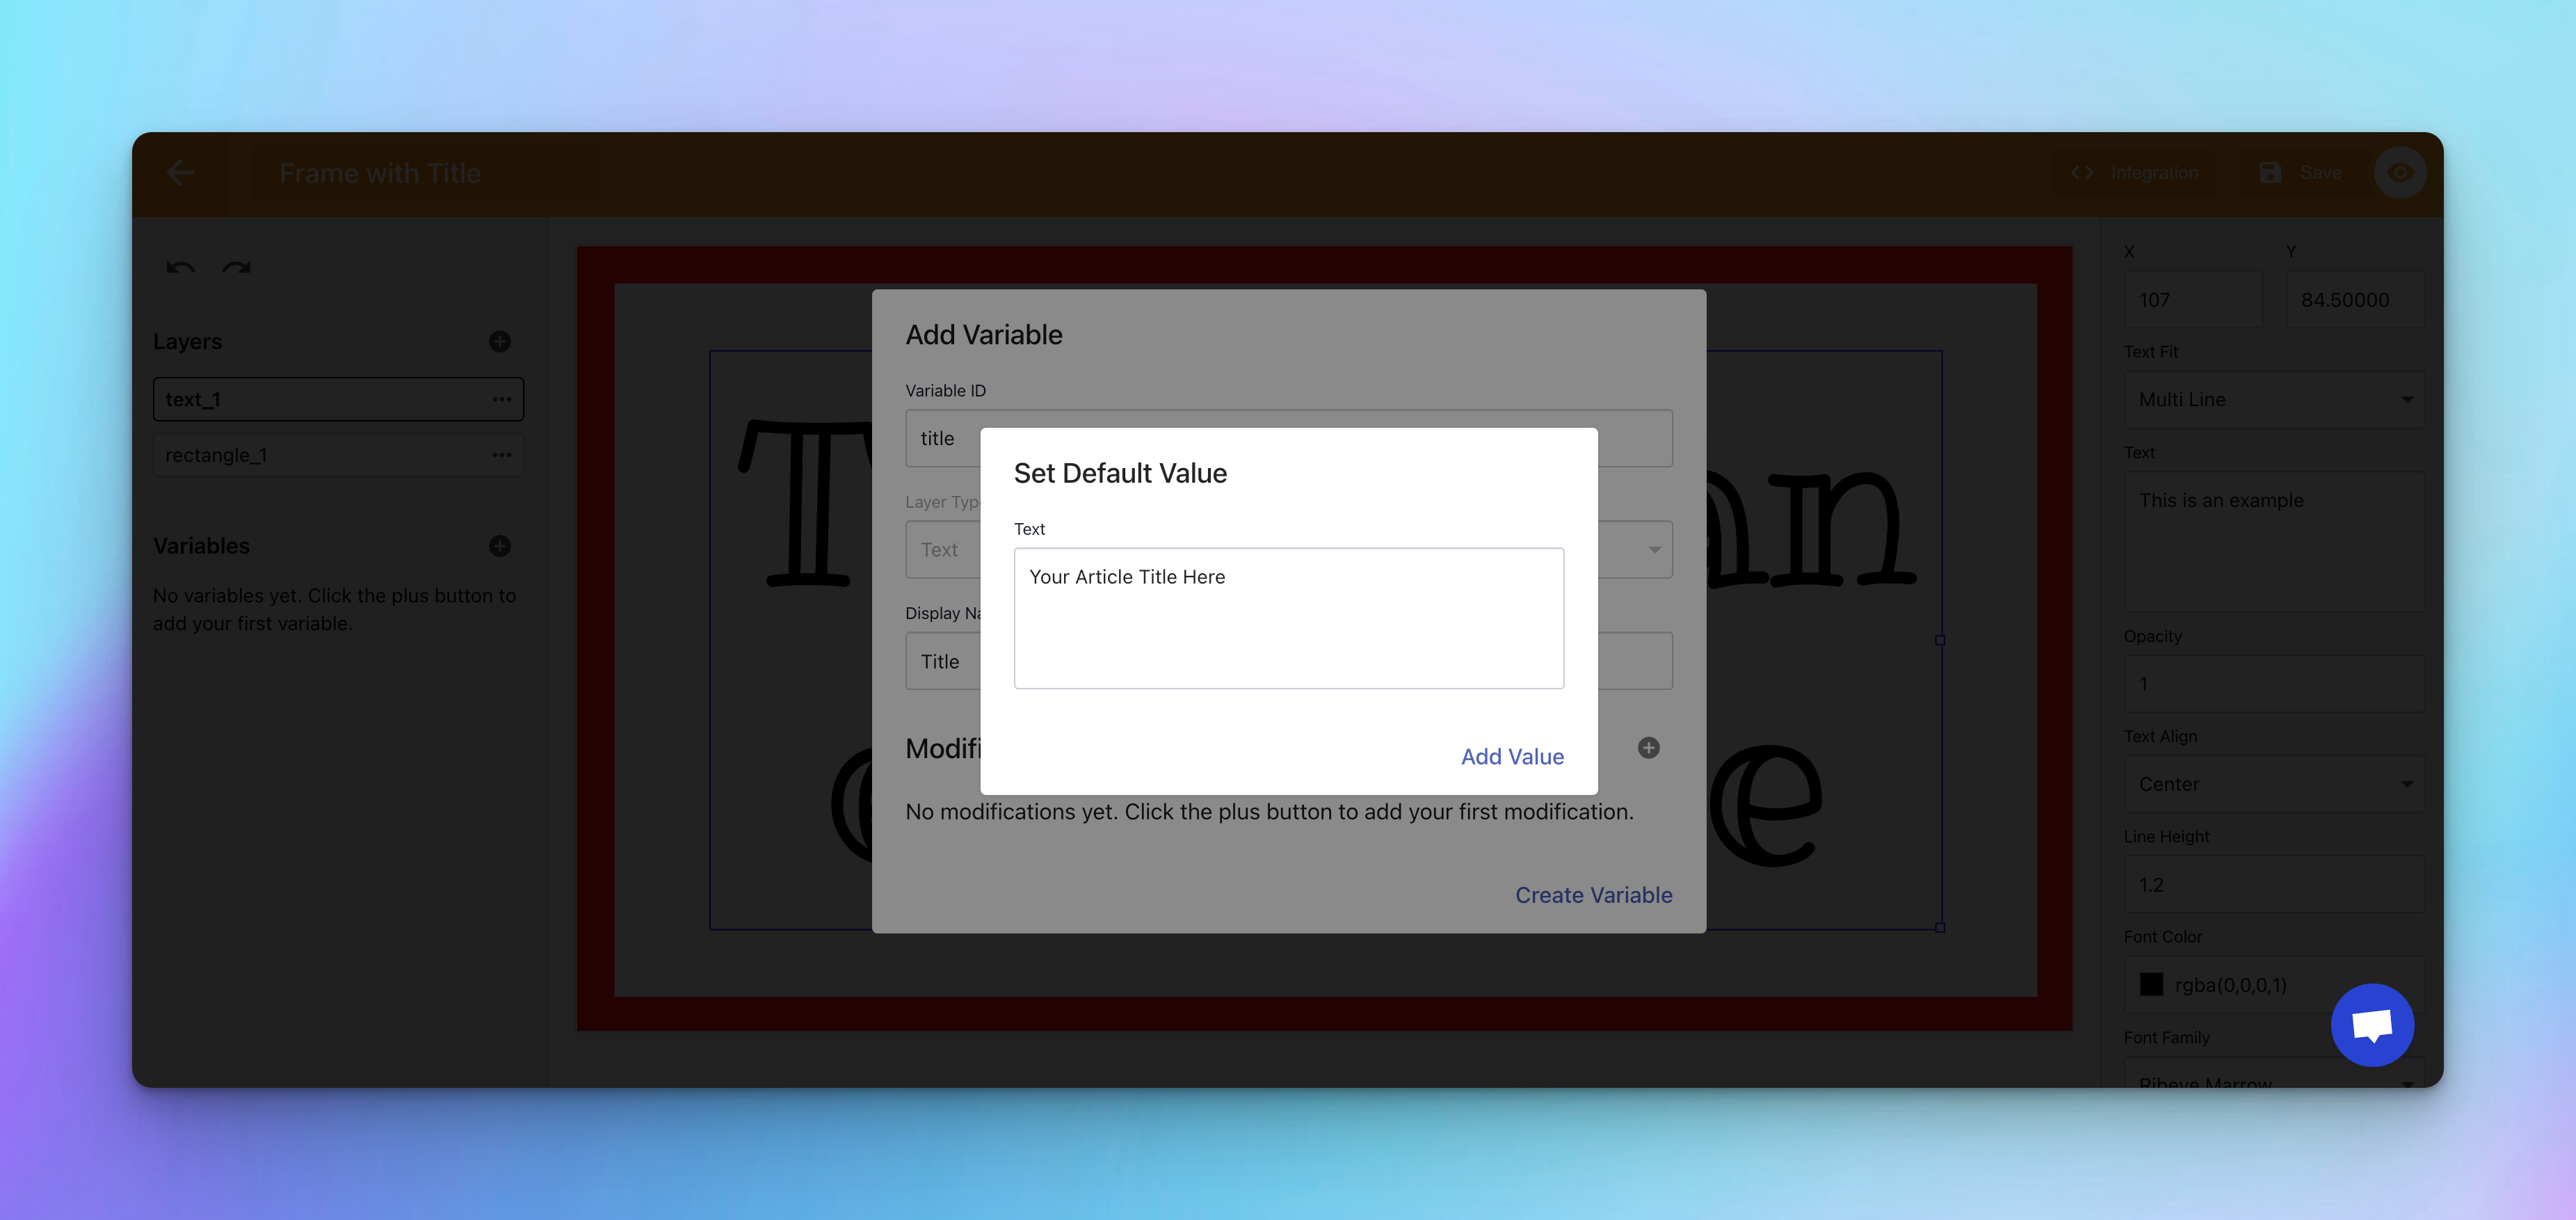
Select “Text” Modification: From the available options, select “Text” to make the text content of the layer dynamic. Following selection, you're prompted to enter a "Default Value", which will display in the template preview when specific content isn't provided. Enter a placeholder like “Your Article Title Here” and click "Add value" to save.
After setting the default value for your text modification, you will be brought back to the create variable screen.
Finalizing the Variable: On the create variable screen, confirm your settings by clicking the "Create Variable" button. This saves your variable and its modifications.
Attaching the Variable: You will return to the "Attach to Variable" dialog. Your newly created variable, title, will now be listed. Select it to attach the text layer to this variable, making the text field dynamic.
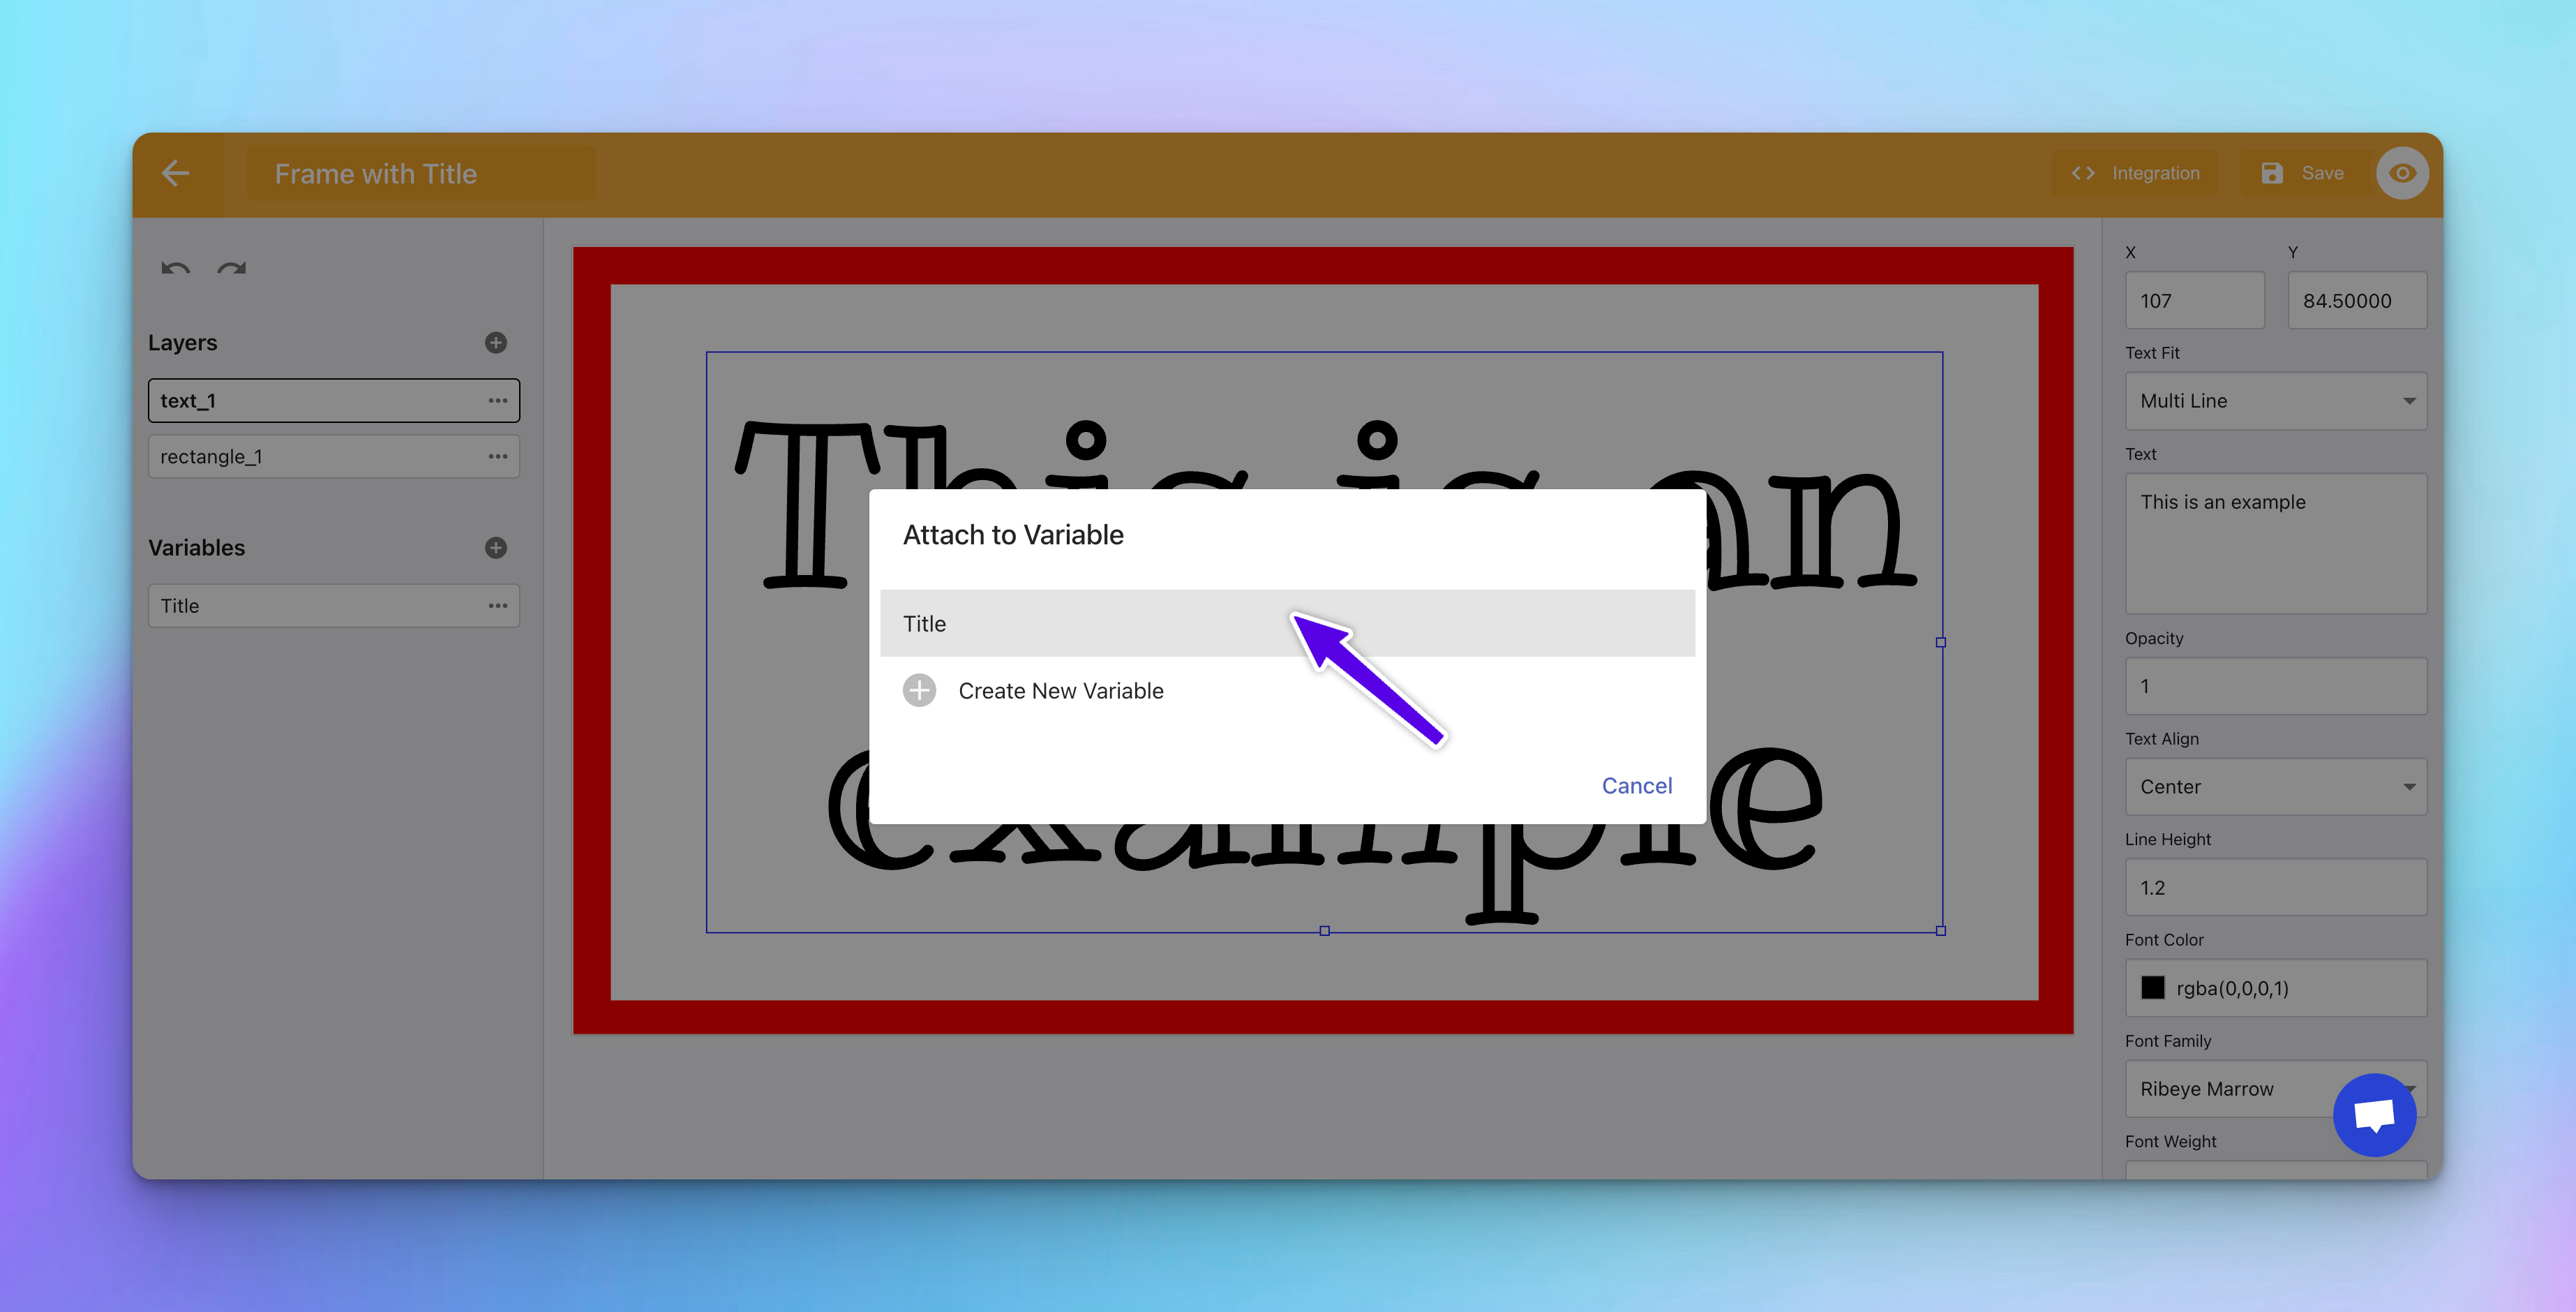
By completing these steps, the text layer is successfully attached to a dynamic variable. This allows the text content to automatically update based on the variable's value, such as changing the article title for each page where the OG image is used.
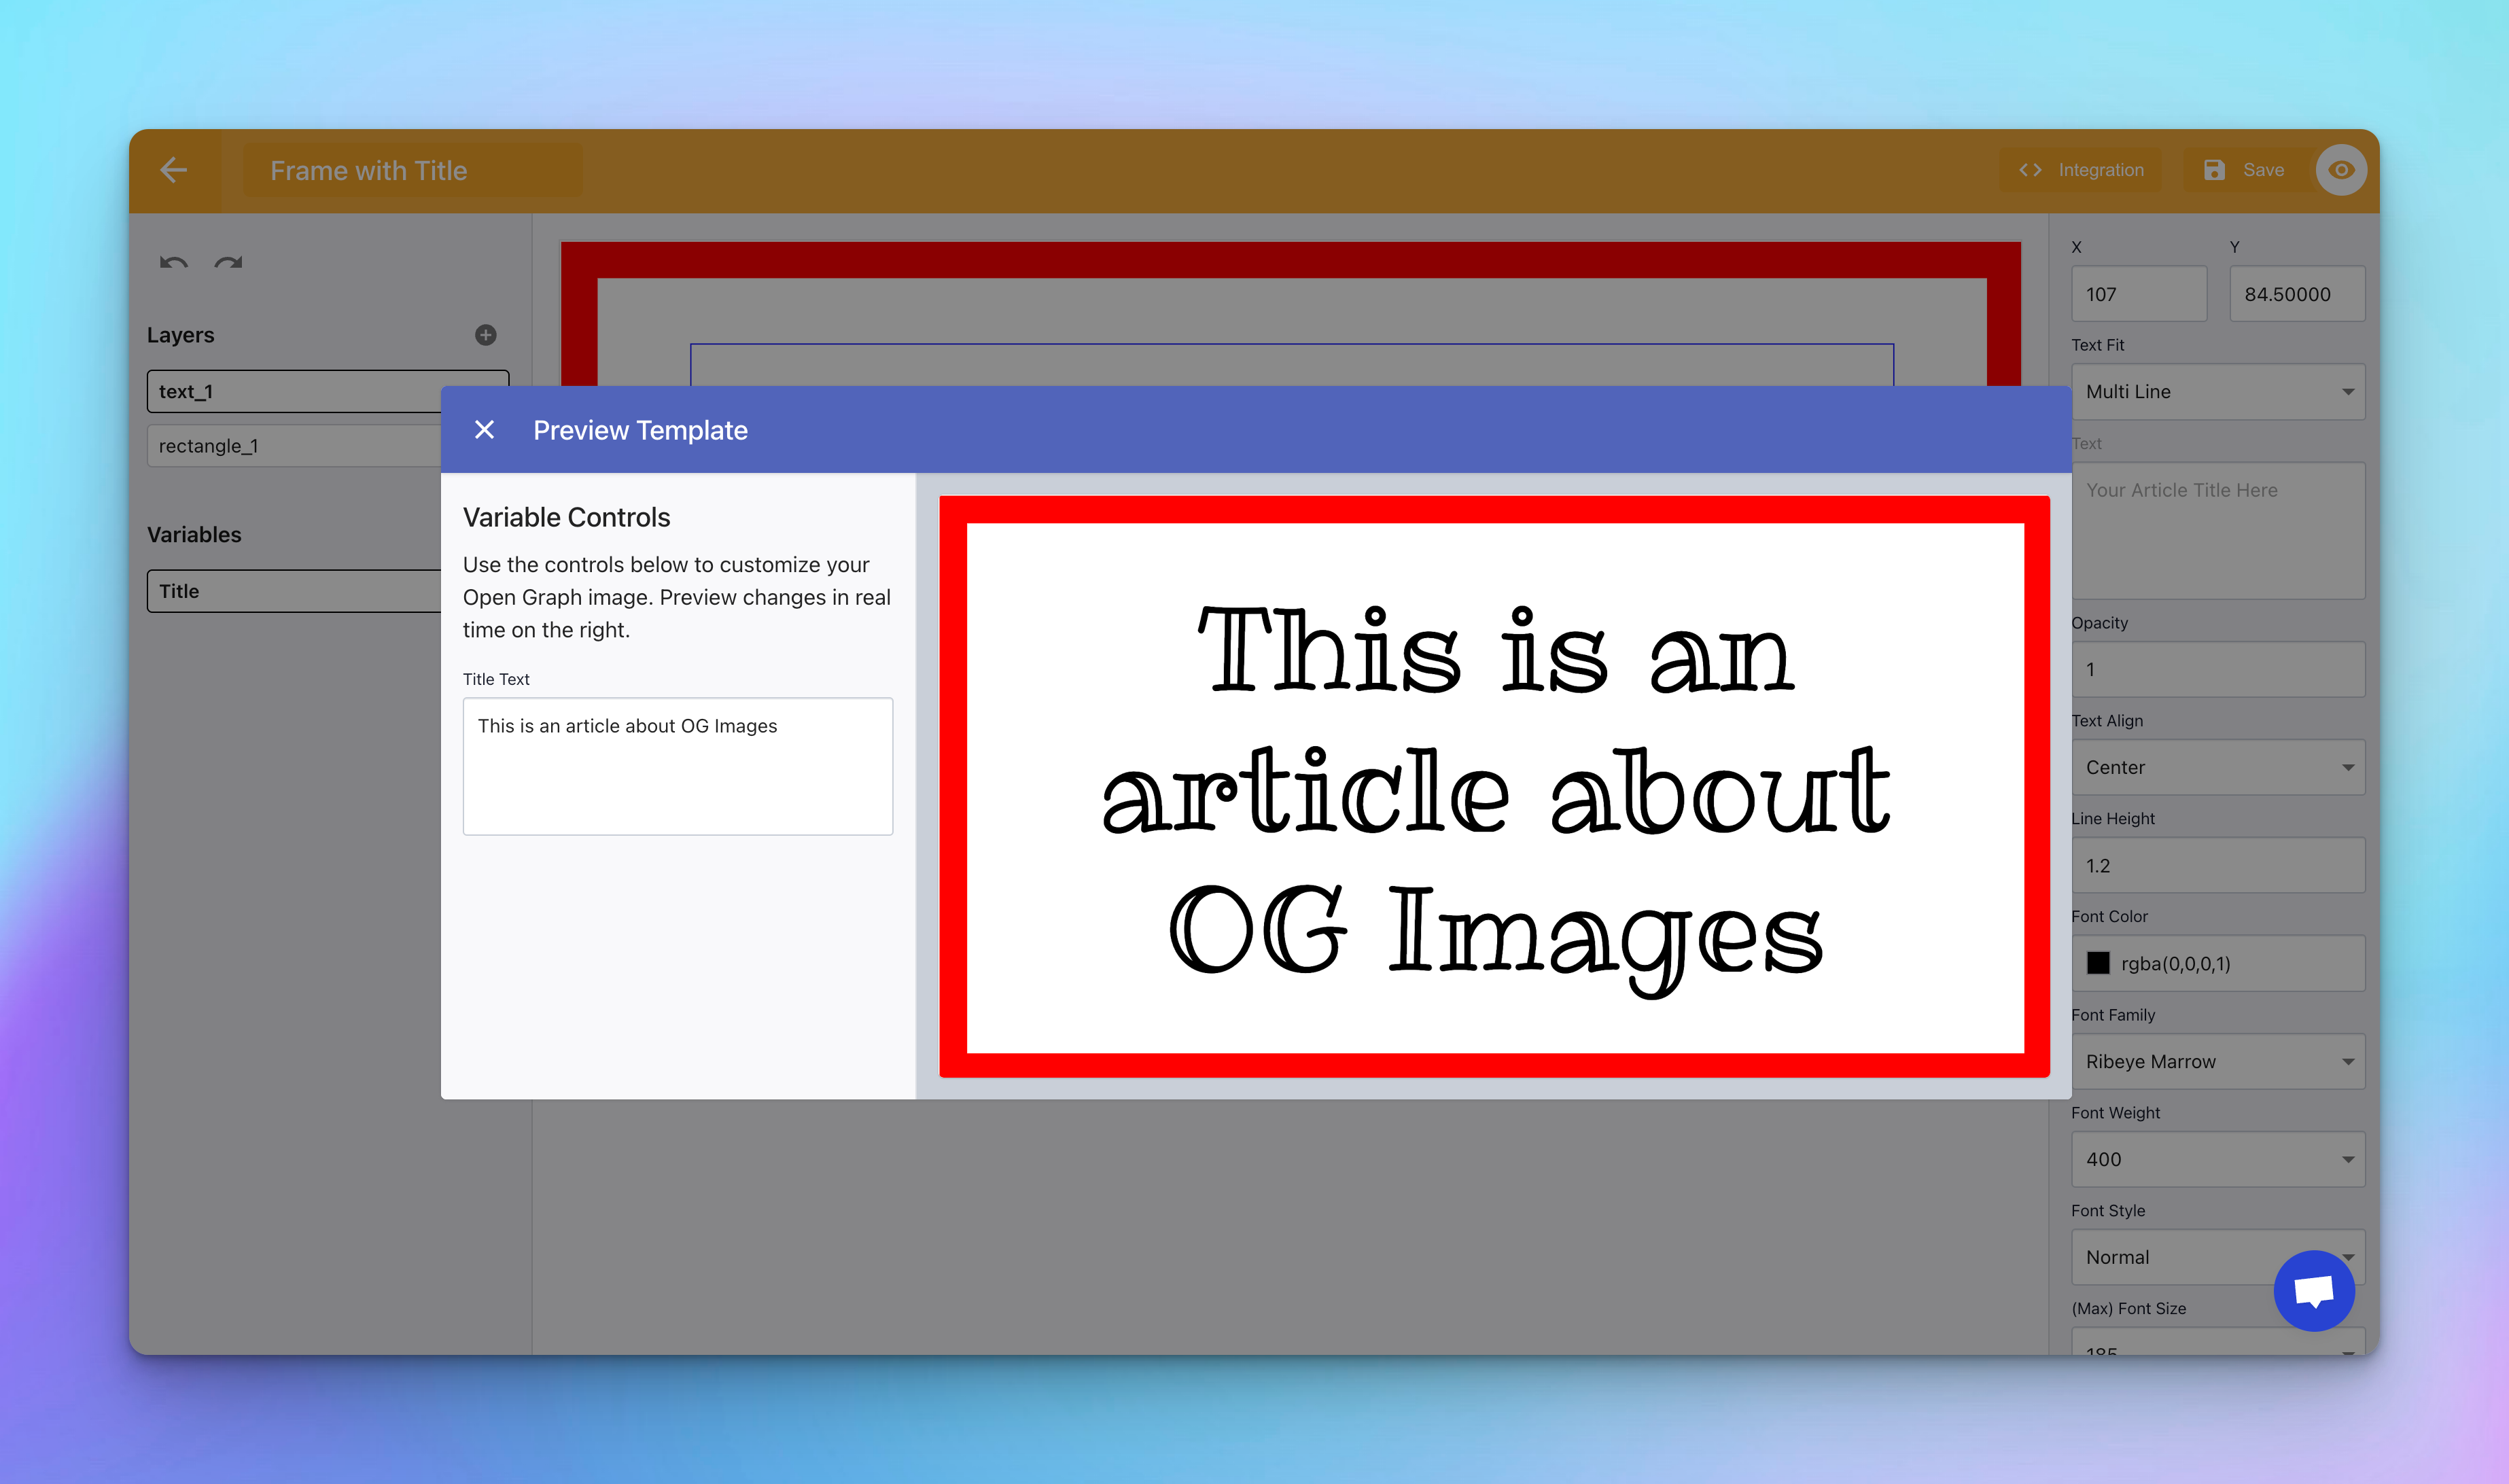
Previewing Your Dynamic OG Image
After successfully attaching your layers to variables, you have the power to preview how your dynamic OG image will look with different values. This step is crucial for ensuring that your template behaves as expected, adapting to the content it represents.
How to Preview Your OG Image
- Locate the Preview Icon: On the top right of the dashboard, find the "eye" icon. This is your gateway to previewing the dynamic OG image you've created.
- Open the Preview Screen: Click on the "eye" icon. A new screen will open, displaying your dynamic fields on the left and the image preview on the right.
- Experiment with Values: In the dynamic fields section, you can enter different values to see how they affect the image in real-time. This interactive preview allows you to test various titles, descriptions, or any other variables you've set up in your template.
- Adjust as Needed: Use this opportunity to tweak your template or the variables' default values. The goal is to ensure that your OG image looks perfect, no matter what content it reflects.